


- Joined
- Nov 26, 2020
- Messages
- 714
We tell you how to encrypt your hard drive and data on it so that attackers don't get access to them.
Hard disk encryption protects all files at once. To use a computer with an encrypted hard disk, you must enter a password or other key when logging in, otherwise the data on the disk will not be available.
This type of encryption is good as a first line of defense. If someone steals your laptop or extracts a disk from one of the servers, they will need to crack the hard drive encryption to gain access to the device.
With this type of protection, you can also use folder-level encryption and individual file encryption.
Disk encryption
BitLocker Device Encryption is a Microsoft tool for full disk encryption, it is built into Windows 10 Pro and Enterprise.
BitLocker has several disadvantages:
There is an alternative - the VeraCrypt program, which does not have such disadvantages:
With all this in mind, in the next section, we'll show you how to install VeraCrypt.
How to install VeraCrypt to encrypt your hard drive in Windows 10
While installing VeraCrypt is much easier than installing Bitlocker, it's not all that simple. If you do something wrong, you may lose files or even access to the entire disk.
We recommend that you read the instructions before starting the installation. If you are not sure that you can do everything correctly, or you are afraid of losing your password, then it is better not to use this type of encryption.
Installing VeraCrypt
VeraCrypt installation guide for Windows 10:
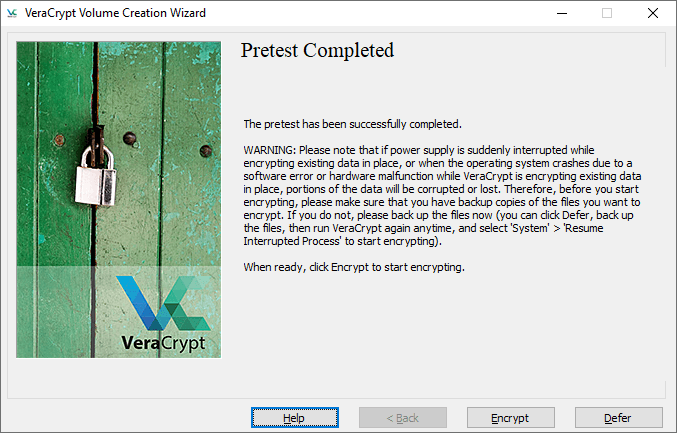
VeraCrypt recommends making backups of all important files before encrypting the system. This will allow you to restore them if something serious happens in the middle of the encryption process, such as a power failure or system crash. When you're done, take a deep breath and click Encrypt. VeraCrypt will show you documentation that you should print out. It specifies when to use the VeraCrypt recovery disk after encryption is complete. Then the encryption process itself will start.
After that, you will need to enter your password every time you turn on your computer.
Hard disk encryption protects all files at once. To use a computer with an encrypted hard disk, you must enter a password or other key when logging in, otherwise the data on the disk will not be available.
This type of encryption is good as a first line of defense. If someone steals your laptop or extracts a disk from one of the servers, they will need to crack the hard drive encryption to gain access to the device.
With this type of protection, you can also use folder-level encryption and individual file encryption.
Disk encryption
BitLocker Device Encryption is a Microsoft tool for full disk encryption, it is built into Windows 10 Pro and Enterprise.
BitLocker has several disadvantages:
- If BitLocker Device Encryption was not pre-installed on your computer, installation and configuration may be difficult. The Microsoft website has a list of devices with Bitlocker pre-installed;
- Bitlocker features may vary from device to device, depending on your motherboard;
- As mentioned earlier, BitLocker only works with Windows 10 Professional and Enterprise.
There is an alternative - the VeraCrypt program, which does not have such disadvantages:
- Installing VeraCrypt is much easier than installing BitLocker;
- VeraCrypt does not depend on your computer's hardware components;
- VeraCrypt works on any version of Windows 10.
With all this in mind, in the next section, we'll show you how to install VeraCrypt.
How to install VeraCrypt to encrypt your hard drive in Windows 10
While installing VeraCrypt is much easier than installing Bitlocker, it's not all that simple. If you do something wrong, you may lose files or even access to the entire disk.
We recommend that you read the instructions before starting the installation. If you are not sure that you can do everything correctly, or you are afraid of losing your password, then it is better not to use this type of encryption.
Installing VeraCrypt
VeraCrypt installation guide for Windows 10:
- You will need a USB flash drive to perform a veracrypt disk disaster recovery. Take a USB drive and format it to FAT or FAT32 so that it's ready when you need it.
- You will also need a program that can decompress archives. We recommend 7-zip, which is free and open source.
- Go to the VeraCrypt download page and find the Windows installer.
- Run the VeraCrypt installation and leave all the default settings. In the first window, you can select the installation language, there is Russian.
- After some time, the message "VeraCrypt installed successfully" will appear.
- Click OK and then Finish to complete the installation. VeraCrypt will display the message as shown in the screenshot below.
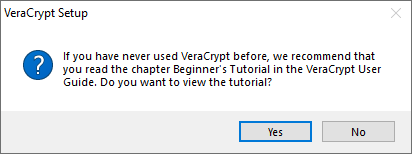
- If you haven't worked with VeraCrypt, it's best to go through this tutorial. Click "Yes" to view the guide or "No" to skip it. In any case, we'll show you the rest of the steps.
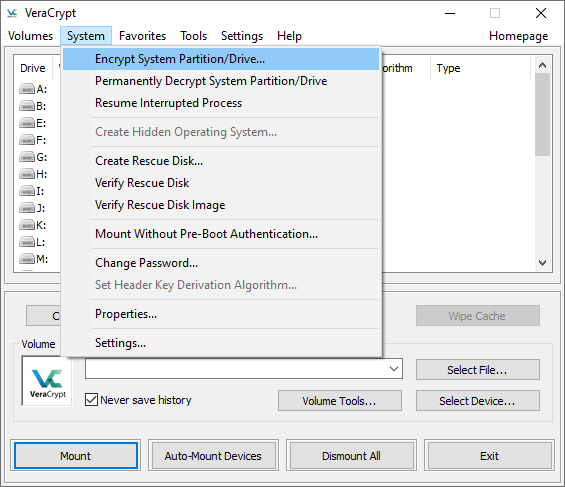
- Run VeraCrypt. Select the "System" menu, then "Encrypt system partition / disk".
- The Veracrypt volume creation Wizard window appears. You will need to choose the type of encryption - normal or hidden. The normal one simply encrypts the entire system. This is what we need, so choose it.
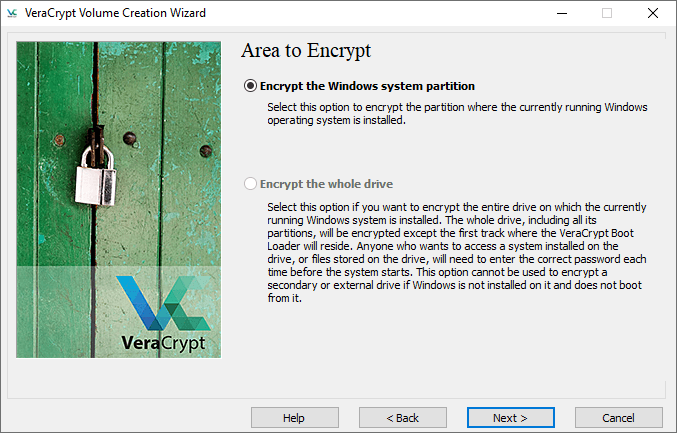
- The program will then ask whether to encrypt only the Windows system partition or the entire disk. If you have multiple partitions with important data, you can encrypt the entire disk. If you have only one partition on the disk (as we have), there will be one parameter - "Encrypt the Windows system partition". Select this option and click "Next".
- The next window is "Number of operating systems". If you have multiple operating systems, choose multiboot. Otherwise, select single download. Click the "Next" button.
- The encryption options window will appear next. We recommend that you choose AES for encryption and SHA-256 for hashing. Both are widely used algorithms.
- The next step is the password. It is better to choose a reliable one to protect the system from hacking. Many password managers (such as Bitwarden) have password generators. Note: VeraCrypt displays a warning if the password is less than 20 characters long. Click the "Next" button.
- More - a collection of random data. You will need to drive randomly with the mouse inside the window. This increases the security of the encryption keys. As soon as the indicator at the bottom of the window fills up, proceed to the next step.
- Then the Generated keys window will appear. Here you just need to click the "Next" button.
- Next, you need to create a recovery disk. The explanation is shown in the picture below. You can skip creating a physical recovery disk, but this is dangerous. Pay attention to where VeraCrypt will store the ZIP image, then click "Next".
- If you didn't skip creating a recovery disk in the previous step, you'll need to take care of it now. VeraCrypt doesn't tell you how to do this, but we'll show you how. Remember when we asked you to find a USB drive? Insert it into your computer. Now go to the directory where VeraCrypt stores ZIP images. Use 7-zip (or another program for extracting archives) to extract files from the archive " VeraCrypt Rescue Disk.zip" to the root of the USB drive. When this is done, click Next to have VeraCrypt verify that the copy is correct.
- If everything went fine, you will see the message box "recovery Disk checked". Remove the USB drive from your computer and proceed to the next step.
- Next, the "cleaning Mode" window will appear normally, you don't need to do anything with this function. Make sure that it is set to "None (fastest)", and click "Next".
- The "pre-test system encryption" window appears. VeraCrypt will now check if the encryption works on your system. The image below explains in detail what will happen. Click "Test" to see how it works. Note that VeraCrypt will probably show you a few more warnings and such before it actually runs the test, so be prepared for that.
- If everything went well, the computer will restart and you will see a window like in the screenshot below.
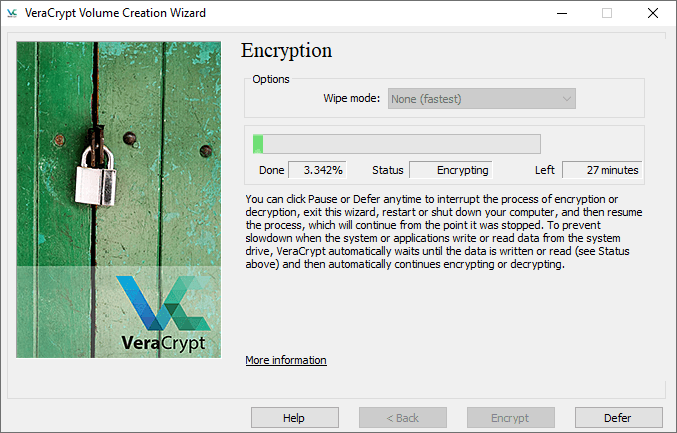
VeraCrypt recommends making backups of all important files before encrypting the system. This will allow you to restore them if something serious happens in the middle of the encryption process, such as a power failure or system crash. When you're done, take a deep breath and click Encrypt. VeraCrypt will show you documentation that you should print out. It specifies when to use the VeraCrypt recovery disk after encryption is complete. Then the encryption process itself will start.
After that, you will need to enter your password every time you turn on your computer.