


I dedicate this book to
the developers of the software,
the designers of the mining rigs,
the miners digging for BTC blocks that keep the network alive,
the exchanges and services that tie non BTC to BTC so this market can coincide with traditional
markets,
the old hands that continue to help others enter the marketplace,
the newcomer who will be an old hand soon enough,
the merchants that use BTC in their Markets,
the depositors,
Cindi for editing this,
and my wife who realizes that I have BTC fever.
-Michael
Contents
Introduction
What Is A Bitcoin?
Bitcoin Storage
Bitcoin Exchange
Funding Your Market Account
Extracting Funds to Government Backed Currency
Bitcoin Transactions
Other Transaction Types
Bitcoins in Action
Earning Bitcoins
Bitcoin Underbelly
Appendix A: Other Resources
Appendix B: Bibliography
Introduction
The goal of this book is not to be the complete guide to Bitcoin (BTC). This eBook is meant to
get the new user up to speed quickly and safely. The user should be able to have a secure
wallet, buy and sell BTC, accept and send BTC with the same level of trust and confidence as
the existing user base.
There are many people before me that put a lot of hard work into documenting everything
there is to know about Bitcoins. My goal is to condense all that into something that will get
you up and running quickly. If you are the type of person willing to take the time and make the
mistakes, you can figure it out without this eBook. I had it figured out in about three weeks of
research and something like 80 to 100 hours of time. There has been even more time added
since then. I hope to fast track your user’s experience and get you using the BTC infrastructure
as easily as possible. The goal is to get you up to speed and using the Bitcoin network in the
time that it takes you to read this eBook.
I will make references throughout the eBook to a number of additional resources that expand
on the information that I’m giving you. Often times I will point to the wiki site. Throughout
many places in the eBook, there are screenshots from copyrighted sources. I did obtain the
written permission to include the screen shots. I hope you will visit the sites referenced in the
eBook.
What Is A Bitcoin?
A Bitcoin is a unit of measure in an online currency exchange system. Unlike government
backed fiat, such as the USD, there is no government or central owner of the BTC (Bitcoin). A
Bitcoin is traded within a peer to peer network which uses cryptographic processes to build
trust around each transaction, thus building proof of ownership for your BTC. According to the
Bitcoin wiki site:
“Bitcoin is an experimental new digital currency that enables instant payments to anyone,
anywhere in the world. Bitcoin uses peer-to-peer technology to operate with no central
authority: managing transactions and issuing money are carried out collectively by the
network. Bitcoin is also the name of the open source software which enables the use of this
currency.
The software is a community-driven open source project, released under the MIT license and
originally created by Satoshi Nakamoto.
Bitcoin is one of the first implementations of a concept called crypto-currency which was first
described in 1998 by Wei Dai on the cypherpunks mailing list. Building upon the notion that
money is any object, or any sort of record, accepted as payment for goods and services and
repayment of debts in a given country or socio-economic context, Bitcoin is designed around
the idea of using cryptography to control the creation and transfer of money, rather than
relying on central authorities.” (anonymous, 2012)
Let’s define a few terms.
Bitcoin: a unit of measure for the currency traded, which can be sent over the internet
Block: used to record the ownership of the BTC within the network
Hash: used in the cryptographic process
Market Value: the total number of BTC times the current exchange rate in the government
backed currency
Mining: The process of finding cryptographic hashes that can be used to keep the network
running or to find new blocks of 50 BTC which enter circulation after found
The current number of blocks is 199,446. There are 9,972,350 BTC and the USD Exchange rate is
$12.10 / BTC. So, the total market capitalization is $120,665,435 USD. In simple terms, if I had
$121 Million USD, I could buy all the BTC in existence if everyone sold them to me at the
current rate.
As I will explain in the chapters that follow, the exchange rate is determined by supply and
demand. What you should take away now is that the number of BTC is not fixed at this time
but growing. In the future it will become fixed.
The number of BTC grows slowly over time and will reach a maximum number at 21 million at
which time there will be no more BTC created. The only method through which new BTC can
enter into the market is through BTC Mining operations. This is where users buy specialized
computer equipment which can be used to process the work required to find the unique
hashes that are used for the network. The miners keep the network alive. The hardware they
use is what keeps the network traffic flowing. Without it moving, a transaction would not
occur. The miners must buy the equipment and pay for the electricity to run it. In exchange,
they stand a chance of finding new 50 BTC Blocks, known as a reward. The reward will reduce
to 25 BTC sometime around 12/1/2012. Once a miner finds the reward it becomes theirs.
Some miners mine in pools that share in the finds over time.
If you are the sort of reader that is strong in math and are looking for a really good source of
information about how the Bitcoin infrastructure works, here is a good link to the Bitcoin wiki:
 en.bitcoin.it
The eBook, which can be found for $0.99 on Amazon, describes the math in great detail.
en.bitcoin.it
The eBook, which can be found for $0.99 on Amazon, describes the math in great detail.
Bitcoin: A Peer-to-Peer Electronic Cash System [Illustrated]
ie=UTF8&qid=1348453217&sr=8-1&keywords=Bitcoin%3A+A+Peer-toPeer+Electronic+Cash+System
Bitcoin Storage
As a user of the Bitcoin network, you will eventually own your own BTC. You’ll need
somewhere to put them. The most logical place is a wallet. As it would happen, this is exactly
where you would put them, into an electronic wallet. The wallet can reside locally on your
computer, on a USB Stick or online in one of the many online wallet sites.
As a professional security practitioner, I feel the need to make the following statement with
regards to all implications of security referenced in this eBook:
Note: All claims to security in this book cannot take into account all threat vectors, namely
you. If you allow an attacker to infiltrate your computer with a Trojan that has a back door
and key logger, they will likely end up with your wallet.
There are many unforeseen attack surfaces. I will attempt to document some good practices. I
also cannot speak to the level of security actually provided on the secure online wallets.
Recently an exchange was infiltrated and approximately $250,000 USD worth of BTC was
stolen (Kirk, 2012).
My goal is not to scare would-be users away, but I do want to instill in them a fair sense of
security. I can say that I use the Bitcoin network and feel safe in using it.
Trading BTC
Let us start with how BTC is exchanged. In simple terms, the process of sending BTC from one
user to another is based on asymmetric cryptography. This means that if Alice wants to send
Bob 12.5 BTC, the following would have to occur:
1. Bob uses the wallet application to create an address, which is represented by the
software as a long string of alphanumeric characters.
2. Bob gives Alice the address which is the public key for which Bob has a matching
private key in his wallet.
3. Alice uses her Bitcoin application to send 12.5 BTC to Bob using the provided address.
4. The transaction is made public on the network and miners begin to process it.
5. Once the transaction has gone through enough cycles on the network, it is released to
Bob.
The 12.5 BTC are now no longer Alice’s. The 12.5 BTC now belong to Bob. The information that
proves Bob’s ownership exists in the database of blocks which is stored on your local PC by the
wallet application or on the online wallet service if you choose an online wallet. The proof of
ownership for Bob is that private key which is stored in his wallet. The fact that everyone in
the network has the same information protects Bob’s right to ownership as long as he retains
the secret keys. He could give someone his wallet, or it could be stolen from him and the
bearer would have the ability to take the BTC and transfer them to another account.
Online Wallets
The choice to use an online wallet is one which should be weighed heavily. I would like to
quote something from the wiki which I believe is very important:
“When bitcoins are stored online, the provider retains full control of those amounts. You are
trusting a third party to maintain your Bitcoin balance on your behalf. In comparison, if you run
the Bitcoin software yourself, you are in full control of your coins so long as the wallet file
stored on your computer is kept secret and secure.” (Anonymous, Browser-based wallet, 2012)
A list of eWallets can be found here: https://en.bitcoin.it/wiki/Category:EWallets
A newer breed of eWallet called Hybrid eWallet can be found here:
en.bitcoin.it
A Good place to start when creating an online wallet is Blockchain:

 blockchain.info
Step 1: Create a New Wallet
blockchain.info
Step 1: Create a New Wallet
Their online wallet can be found at:
 blockchain.info
Select “Start A New Wallet”.
blockchain.info
Select “Start A New Wallet”.
Step 2: Create Password
Create your password, and confirm it. Select a complex password. Use the following rule:
· At least one capital letter
· At least one lowercase letter
· At least one number
· At least one symbol ~!@#$%^&*()_+=-[]\{}|;’:”,./?><
· Make the password at least 24 characters in length
Following these steps will make it near impossible for an attacker to crack the password and
gain access to your account.
Next: WRITE DOWN THE PASSWORD, and keep it safe.
Enter the Captcha.
Press the “Continue” button.
Step 3: Make Note of the Wallet URL
I blocked out my address since I do not want to provide extra information to an attacker. Copy
the entire URL from https:// through to the end of that line.
You can optionally add an email address and nickname.
Then press “Proceed To Login”.
Step 4: Login to Online Wallet
Again, I covered up my address. You’ll notice that the address in the Address Bar of your
browser is the one previously noted.
Enter your password which you created in Step 2.
Press “Open Wallet”.
From here you can:
· Fund your wallet
· Withdraw funds
· Modify your account settings
· Back up your wallet
· Send money
· Receive money
· View your transactions
· View account balances
You’ll notice an address above the twitter bird. This is the address that others will use when
sending you BTC.
Until you have become very familiar with the BTC environment and your wallet, you should
consider not playing with the import/export functionality.
In the remainder of the book, I will demonstrate various tasks:
· Funding your wallet
· Sending BTC
· Receiving BTC
· Viewing transactions
If you have an iPhone, there is an application (of course) that will allow you to perform some
basic functions with your wallet. For instance you can view your balance, send and receive BTC.
Here is an address for more information on it:
blockchain.info
The previous article indicated that you could not download from the App Store. Apparently
this has been resolved, because I have downloaded it from the App Store and it works just
fine. Additionally, your other options are to load it on a jail broken phone. I highly discourage
this since any jail broken phone can easily be compromised by an attacker and render your
account vulnerable. If you have a way to build the app, you can download the source code,
compile it and load it on your phone. You will need a Mac and a number of tools to do this. I
have on occasion done this in the past. It is not for the faint of heart. If like me, you are a
software developer and happen to have this environment already, this might be an option.
Android is not left out either. There is an app on the Android Market. I have not reviewed this
app, but it does exist. Here is the address for more information:
blockchain.info
Step 5: Verify Your Email
You will receive an email shortly after setting up your account. When you receive the email:
· Log into your account if you are not already logged in.
· From the home screen, press the “Account Settings” button on the right-hand side of
the screen.
· You will be taken to a screen which has a small menu on the left-hand side.
· The General menu will be selected by default.
· Enter the code provided in the email and press the “Verify” button.
Step 6: Optional Security Features
If you decide to use an online wallet, consider some of the additional precautions available
such as:
· Double encrypting your wallet - This will use the password previously generated to
authenticate you. The second password will be used to make transactions.
· Use multi-factor authentication
· Payment notifications
Step 6A: Double Encryption
From the main URL:
blockchain.info
Select “2 Double Encryption”.
Enter a password using the previously mentioned standard and write it down.
Step 6B: Multi-Factor Authentication
Multi-Factor Authentication (MFA) allows you to increase the security of your account. A
password helps keep your account safe because it allows you to keep something that you know
privately and present it to the service. Only someone that knows this piece of information can
gain access to your account. MFA allows you to add something that you have. One such
solution is the YubiKey which is a small USB device that plugs into your computer and acts like
a keyboard. When you press the button on the YubiKey, it types a One Time Password (OTP).
(This combined with your password that you know means that only if someone has both can
they access your account.) This means that someone can only access your account if they have
both the OTP and your password that only you know.
To configure your online wallet to use MFA, log in to the wallet.
Select the “Account Settings” button on the right-hand side of the screen.
Select the “Security” option in the menu on the left-hand side of this screen.
One option is to use a Yubikey. Yubikeys are a small USB device that stores cryptographic string
hashes and are synced to a server. You can find more information here:
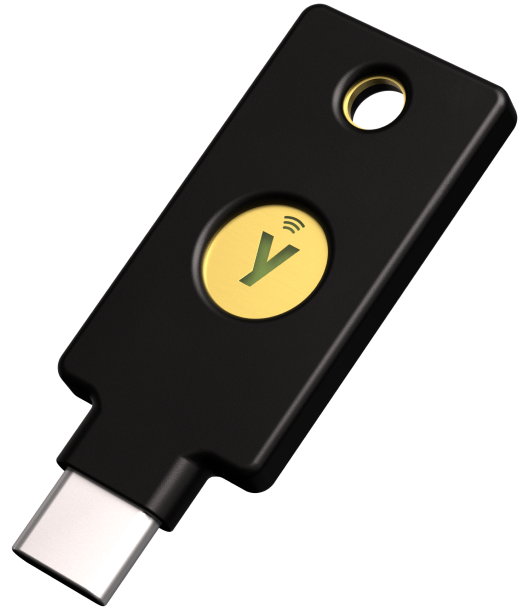 Using multi-factor authentication means that if an attacker does get your password, they will
also need the USB key in order to gain access to your account. This follows the rule of
something you know, your password, and something you have, your Yubikey. If you do choose
to use an online wallet, I strongly suggest you invest in a $25 Yubikey.
Step 6C: Email Notifications
From the Account Settings screen, select the “Notification” menu option.
The options on this screen are fairly straight forward. You can have the wallet notify you via a
number of different methods and for a couple of different reasons. The simplest is to select
email.
To set up SMS Notifications, select the “SMS Notifications” checkbox. You will be prompted
with a list box of country codes. Select the one that fits where your phone service resides.
Then enter your phone number. In the U.S., make sure to enter your area code. Then press
“Enter” on your keyboard.
NOTE: I entered dashes the first time and the message didn’t come through. After waiting
about 15 minutes, I returned to the page and took the dashes from 555-555-1212 and made
the number 5555551212. Then, I hit enter again, and the SMS message arrived within 10
seconds.
When the confirmation code arrives, enter it, and then Press “Verify”.
Important Note for Online Wallet User
I will use the personal wallet to demonstrate much of the functionality around sending,
receiving BTC, as well as funding your account. While the steps will differ, the functionality can
be translated to how you would do it in the online wallet. The next section describes how to
create your personal wallet.
Personal Wallets
I will walk you through the process of installing and setting up your wallet on your local
computer. The basic setup will install a wallet.dat and blocks database on your local
computer. I will show you how you can secure this by moving it onto a secure drive using
TrueCrypt, an open source tool for creating secure drive volumes. I will walk you step by step
through the process. This will allow you to either store the wallet on a secure drive on your
computer’s hard drive or place it on a USB memory stick which you can secure in a fire safe or
other safe location.
Remember that if you lose the wallet, you have lost your money, so we will also see ways to
back this up. If all of this seems too much for you, then stick with the online wallet.
Step 1: Install the Bitcoin Wallet Software
Download the software from the wiki:
en.bitcoin.it
Depending on your operating system, download the correct one for you.
The wiki also has a set of screen shots to walk you through the set up:
en.bitcoin.it
There is even a link to get some free BTC (even if it is just a fraction of a BTC).
Step 2: Synchronize the Blocks
Once you have the software installed, you will notice that it begins a process of synchronizing
the blocks. This can take about 24 hours to complete and will transfer 2 to 4 GB of data to your
computer. It is an important step, and you will have to let it complete before you continue
performing other steps.
I recommend that you continue to read and come back to this step once it is complete. You
can continue with Steps 3 & 4 while you wait.
Once the initial blocks are installed, then you can continue with Step 5.
Step 3: Install TrueCrypt
There are a number of applications that can be used for this step. I chose TrueCrypt because
it’s open source, which means it’s free to use. It is also fast and reliable. The fact that it is
open source means that the code has been and can be reviewed by anyone which makes it
much more secure to use.
Download TrueCrypt from here:
Once downloaded, install the application.
Select the defaults.
Step 4: Create Secure Drive
Once installed, open the application:
Select “Create Volume” and follow the wizard.
Select “Next”.
You will want to place the volume either on a hard drive or on a thumb drive where you can
create at least a 10 GB file.
Select “Next”.
The size of the drive needs to be at least 10 GB.
Select “Next”.
This step is so very important. I cannot stress this enough.
Select a complex password. Use the following rule:
· At least one capital letter
· At least one lowercase letter
· At least one number
· At least one symbol ~!@#$%^&*()_+=-[]\{}|;’:”,./?><
· Make the password at least 24 characters in length
Following these steps will make it nearly impossible for an attacker to crack the code and gain
access to the drive should they find it and download it. They will have to download the entire
10 GB file in order to try to crack it.
Next: WRITE DOWN THE PASSWORD, and keep it safe. If you build a small fortune in BTC in
your secure drive and then forget the password to it and you followed my recommendation,
you may be safe from attack, but you’re not going to get into it either. Those BTC will be lost.
Select “Large Files”.
Select “Next”.
Select “Next”.
Then move the mouse around on this next screen and hit “Format”.
Step 5: Move Wallet and Blocks to Secure Drive
Do not continue with this step until the wallet application has finished synchronizing.
If the Wallet application is running, exit out of the application.
Open TrueCrypt and press “Select File”. Then, select the file we created in the above process.
Also select a free drive letter. You will want to use the same drive letter every time.
Now select “Mount”.
Enter your password, and hit “OK”.
If everything worked as it should, now the secure drive should be mounted and looks like a
hard drive.
Now we need to identify where your Bitcoins Wallet file is. The reference for what’s in the data
directory and where you can find it is here:
en.bitcoin.it
Looking at that page, the location for Win7 is:
C:\Users\YourUserName\Appdata\Roaming\Bitcoin
With the Bitcoin wallet application closed, you want to copy the contents of this directory to
your new drive. First, make a directory in the new drive called Bitcoin. Now open that folder
and copy the files into it.
Step 6: Configure Your Wallet Application to Use the New Location
Once the files are copied over, we need to tell the app where the data files are. There is a
command line option that we need to set. To do this on Win7, right click on the desktop
shortcut and select “properties”. If there is no shortcut on your desktop, copy it from the Start
Menu to your desktop if you’d like, or edit the one in the Start Menu. That is up to you. You
will need to note which shortcut you edit. This is where you will need to launch it from in the
future. In the example below, I mounted my secure drive to Drive X, so the wallet.dat is located
in X:\bitcoin.
Notice the –datadir=x:\biticon
Add the parameters after the Bitcoin-qt.exe in the target. This is where you set the command
line option. It will differ for Linux and Mac operating systems. Press “OK”.
You’re done.
Step 7: Reopen Wallet App
The process to open your wallet will always be the following:
1. Open TrueCrypt.
2. Mount the Encrypted Drive.
3. Open bitcoin-qt (your wallet application) using the shortcut with the modified target.
If you try to open bitcoin-qt without opening the encrypted drive first, it will not be able to
locate the wallet or blocks while the encrypted disk drive is mounted.
Each time you open your wallet you will notice that it needs to synchronize with the network.
Do not leave it open. You should only open your wallet when it is required. If you do have a
Trojan or other back door on your computer, your wallet.dat file is vulnerable to being copied
off your system.
There is more information on the wiki about securing your wallet:
en.bitcoin.it
Bitcoin-qt
Once installed and all the blocks are updated, you will see the main overview screen.
The Overview Tab shows the current number of BTC you have and the most recent
transactions.
The Send Tab allows you to send BTC. I’ll demonstrate this in a later chapter.
The Receive Tab allows you to set up addresses that can be used to receive BTC. I’ll
demonstrate this in a later chapter.
The Transactions Tab will show you a history of the transactions for this wallet.
The Address Book allows you to enter addresses that you often send money to.
Export allows you to export your received addresses.
Bitcoin Exchange
Spending Bitcoins is certainly a useful thing to be able to do. However, until it takes over as the
primary currency, (I’m not suggesting it will.) users will need to be able to move government
issued money in and out of the system. This is done through exchanges. Currently, there are a
number of exchanges that convert many different denominations to and from BTC. The price
of the exchange is set by you, the buyers and sellers, in an open market format.
Anyone can sell BTC for USD, EUR or other currency. You can place an order to sell at a preset
amount known as a limit order. When someone decides they need to buy BTC, they can
purchase at that price. Users can also decide that they would like to buy BTC at a preset price.
They can enter a limit order and wait until someone determines it’s fair and sells their BTC.
The exchanges charge a small fee. One such market MtGox, the largest such market, charges
2.5% per trade.
Limit orders are good when you have a lot of BTC that you want to receive a specific price for
and have the time to wait. If you just want to buy or sell BTC, you can place a market order. If
the transaction is small, under a thousand USD, it should hit near the current bid or ask price
depending on if you are buying or selling. If you plan to sell a lot fast, expect to drive the price
down. If you plan to buy a lot, expect to drive the price up.
At the time of this writing, the current market capitalization in USD is $120 Million. You can see
the current market details at:
You can see the Market Book, the list of sell orders and buy orders outstanding for a given
market, at:
MtGox : http://bitcoincharts.com/markets/mtgoxUSD_depth.html
The number of BTC and the price they are being sold at or bought at is listed. There is a
calculator which can be used to determine how much a particular number BTC will cost and if
the order can be filled or not. This is useful if you want to obtain a specific price or if you will
be funding a Bitcoin purchase. You should plan the purchase. You may buy many coins and
drive up the price, then make a purchase shortly after at this elevated price. It is possible that
the price will drop significantly as someone else sells BTC at the bid price rather than your ask
purchase.
For example, based on the numbers in the chart shown above, let’s say you want to buy 742
coins. The last sale price will be $12.24. You will have just raised the price of BTC from about
$12.10 to $12.24 USD. If someone else comes in and sells their BTC to someone based on the
bid, which would occur if they didn’t want to wait to sell, then the new price would be $12.08.
As you can see, there can be some volatility in the markets.
There are a number of different markets that you can trade BTC to government backed
currency and government backed currency to BTC. For a list of the markets, visit the All
Markets page at:
or
A graphical market index with all the current markets can be found at:
The page provides Last Price, 30 day thumbnail, Average Price, Volume, Low and High, Bid and
Ask, 24 hr avg. and volume.
Another list of markets can be found on the Bitcoin wiki:
en.bitcoin.it
Funding Your Market Account
Given the large number of markets and the various ways to fund each of them, it is beyond the
scope of this eBook to describe every possible combination. I am currently a member of
MtGoxUSD, which is also the largest exchange. They claim, as of July 2011, to handle 80% of
the Bitcoin trade. See their home page for the reference: https://mtgox.com. From the current
numbers, it appears they do indeed have the largest share but not 80%. Demonstrating how to
fund on this market account is the best place to start since using it will provide you the best
liquidity.
Step 1: Sign Up for An Account
Once you are signed up, you’ll be asked to go through a verification process. You should
consider doing this. However, if you will not be moving more than $1,000 USD / day and
$10,000 USD /month, you do not need to be verified.
Step 2: Fund Your Account
From the Home Page, Select “Funding Options”.
To get money into the account, you can do a bank transfer, which is best for large amounts. If
you have cash and want to get it into the system fast, the following is one way to do it.
Step 2A: A Cash Deposit through BitInstant
Select “Cash Deposit via BitInstant”.
You can enter an amount and it will tell you the fees. For instance $500 will be $23.45, so
$476.55 will be deposited.
Then select the “Add Funds”.
You will be prompted if it is valid to send. There is an upper limit on deposit through this
method.
TrustCash will use your addresses provided to MtGox to determine the nearest locations where
you can deposit the funds. Select a bank location and fill in the information. You will be given
a receipt to take to that bank location.
The handling fee that I’m seeing is $1.26, which might be different if you use a different bank
than I selected, so the total fee to deposit this money is
· 4.49% + $1 = $23
· $1.26 at the bank
That comes to about 4.9% overall. That is not too bad, but you will lose money in the process
of trying to fund the account.
Step 2B: Alternative BitInstant – BitInstant Site Directly
Before going to the BitInstant site, it is important to note your account number from MtGox. It
can be found at the top of the web page in the center. It will say “Account Number” next to it.
You will need that number to ensure you will receive the money.
Go to the site: https://www.bitinstant.com/
Select “MoneyGram” in the Pay From drop down menu and “MtGox” in the Pay To drop down
menu. You can experiment with other options. Look to see if there are CVS or 7/11 stores that
support transactions in your area. Near me, only MoneyGrams are supported. I can go to WalMart and have it funded.
In the account box, place your MtGox account number.
Enter the amount to send and notification email.
When you do, you will be taken through a series of screens where you will verify additional
information. I cannot finish the process to get the screen shots. If I do, I will have an
outstanding money order. So there are no screen shots for this. When you do this, you will
end up at a ZipZap site where you can enter your phone number and search for a location to
send the MoneyGram.
Once you’re done entering your information, select “Create Payment Slip” at the bottom of the
screen.
Print this out and take it to the location you chose. I’ll continue with the example assuming
you picked Wal-Mart. At Wal-Mart, there is a Money Center generally in the front of the store.
Go there, grab a blue MoneyGram form and fill in the information. The slip you printed out
will have the information you need to properly fill it out.
Pay the clerk the money. Drive, walk, take a cab, bus or train home. Within 30 to 60 minutes,
your MtGox account will be funded.
The fees on this are a little bit less:
· 3.99% = $19.94 on $500
· $3.95 MoneyGram
Total Percentage is 4.78%, which is a little less than if you fund it directly from MtGox.
Step 3: Buying Bitcoins
If you recall from the Exchange section, you can place a market order to tell the system how
much USD you want to spend, and you’ll spend that much money and receive the number of
BTC based on current BTC for sale. Alternatively, you can enter a limit order and set the price
at which you want to buy the BTC. With a limit order, you will need to wait until someone in
the marketplace decides they want to sell at the price you are asking.
To enter a limit order:
· Enter the number BTC to buy.
· Enter the price to pay.
· Select the “Buy Bitcoins” button.
Your open order will be displayed in the bottom section of the screen. If you simply want to
place a market order, check the “market order” check box. Enter the number of BTC you wish
to buy, and you will be told approximately how much it will cost.
You can do the same for Selling Bitcoins.
Step 4: Sending the Bitcoins to Your Wallet
From the Trade window:
· Select “Funding Option”.
· Then, select the “Withdraw Funds” tab.
· Enter the number of BTC to transfer.
· Enter an address from your wallet. (See the section in a later chapter about creating an
address for others to send to you. You will use one of these addresses.)
· Select the Open transaction.
It is optional to pay the transaction fee on small transfers. The transaction fee helps pay the
miners. This is another way to help fund the infrastructure. If you consider adding 0.005 BTC
at $12USD/BTC, it works out to about $0.06. It is worth considering. It will speed up your
transaction. If you don’t, it will still go through but could take longer. The fee will provide an
incentive for the miners to continue to mine.
· Press “Confirm”.
Now check your wallet. Eventually you will see the money there. It does tend to move quickly.
Extracting Funds to Government Backed Currency
There are a number of ways to convert your BTC back to a government currency like the US
Dollar. MtGox is planning to release their MasterCard Debit card which will allow you to
maintain USD balance in your account and spend it directly using the debit/MC. This means
that you will not need to transfer the funds to your bank first. It is due to be released at any
time. Since we have already discussed using this market, when debit becomes available it
would be something worthwhile to look into. It is supposed to tie your USD or other currency
to the debit card which will work like a MasterCard. There really is not much to say about this
since it has not yet been released.
MtGox allows you to perform a bank wire to your bank. This will allow you to extract larger
sums of money directly to your bank. This is good for larger amounts since there is a $25
service charge involved.
Step 1: Where to Go
To get to withdraw the options, on the MtGox site:
· Go to “Home” in the main tool bar.
· Then select the option for “Funding options”.
· OR URL: https://mtgox.com/trade/funding-options
· Then select “Withdraw Funds”.
· Select the “Available Withdraw Methods” drop down to select one of the many
methods.
Step 2: How to Add Other Options
· Press the “Add Withdraw Method”.
· Select the “Bank Transfer”
Select one of the methods that suit your needs.
Step 3: Add money to PayPal
There are a couple of methods to do this. I will walk you through the one I found to be the
easiest. The fees are a little higher.
Step 3A: BTCPak
Go to https://www.btcpak.com/
This is going to allow you to convert BTC to MoneyPak which can be used like cash to fund your
PayPal card or pre-paid debit cards.
You will also need to add an address for refunds to be sent to in the event a refund is
required. This is rare but if for some reason a refund is made and there is no address, the BTC
will be lost. You should use an address that exists in your wallet, so you end up with the
money in the event of a refund.
Without BTC to move out, I cannot show more steps.
You’ll notice that the funding of the MP takes about one hour. The one hour is the time that it
takes for six confirmations of the transaction to occur. If you send money from MtGox and Use
a Green Address, it will create the MoneyPak instantly.
Bitcoin Transactions
Now that you understand what a Bitcoin is, how to store them, what gives them value and how
to fund your account, let us talk about how to send and receive them. When you use a wallet
to store your BTC, you know that it actually stores a key, which proves your ownership. This
key is actually a pair. There is a public key and a private key. The public key is known as an
address. This address can be used to send BTC from one user to another. BTC are traded using
Public Key Cryptography.
A full description of Public Key Cryptography is beyond the scope of eBook. I will give you a
simple explanation. For a complete explanation checkout:

 en.wikipedia.org
.
en.wikipedia.org
.
Two very large prime numbers are found that when used can both unlock a message if the
message is encrypted with one of them. One of the numbers becomes the public key and the
other becomes the secret key. Encrypting with one key allows the message to be decrypted
only by the corresponding number (key). We can then provide our public key, and when
someone uses it to send (encrypt) BTC to us, we are the only ones with our secret key that can
receive (decrypt) it.
Let us say we have Alice and Bob who want to exchange BTC. Both have a key pair.
1. Alice uses Bob’s public key to send the money.
2. The BTC is encrypted with Bob’s public key.
3. The Transaction is signed by many of the miners using the hashes they are finding. This
builds the trust in the network.
4. Bob can then open the transaction with Bob’s private key.
Receiving BTC
To receive the BTC, open your wallet. We will demonstrate here with Bitcoin-qt. Use the
procedures previously noted to open your wallet. Once open, if it has shut down for a while,
you will notice it is out of sync.
Give it a little time and it will begin to sync.
The syncing is the application going out and getting the most current blocks. These blocks tell
the application who owns what. It only knows based on the signed blocks. Either a local
private key in the wallet can decipher the block and prove ownership, or it cannot. These are
the only two options.
So, if someone sends you BTC and your wallet is not in sync, you may not see the transaction
come through. Once all the blocks are in sync, you will be able to see it.
Once you can see the green check mark in the lower right-hand corner, the wallet is synced.
In order to have someone send you BTC, you will need to create an address for them. Click on
the “Receive Coins” button:
Create a new address. Press the button in the lower left side of the screen, “New Address”.
Give it a name. I like using the convention Year-Month-Day name. This allows me to know how
old the address is.
Click “OK”, and the address will show up in the receive window.
To get the address so that you can provide it to others, right click on the address and select
“Copy Address”.
Address to send to: 13QPmiJymZpuv2q2rhdgXWokdybit8cFZC
Now we can provide that address to another person to send us BTC.
When a new transaction comes in, you will see a message in the lower right-hand corner (on
windows).
If you switch to the Overview Tab, you can also see the transaction:
Notice that you see an unconfirmed amount and that there is still a zero balance. The
transaction needs to be processed. Trust needs to be built around this transaction. Once that
occurs, you can spend the BTC. When we cover sending BTC, you will see there is an option to
pay a transaction fee in order to speed up the handling of the transaction.
If you go to the Transaction Tab, you can see the transaction.
Double click on the transaction to see the details.
About nine minutes later, the transaction received its first confirmation.
Switching to the Overview Tab, we can see that the BTC is now confirmed and is in your
balance:
Sending BTC
In order to send BTC, you first need an address to send to. For this demonstration, we will use
the eBook Demonstration in my other wallet:
1P9scjVao6n9t9ihNUBGXiCSHYAghzhzY7
Please feel free to send BTC to any of the addresses listed in this book. J Donations are
welcome even if it is only 0.01 or less.
To send, click on the “Send Coins” button.
Then enter the address and a label to help you remember why you sent me the BTC.
When the confirm message appears, click “Yes”.
If you do not have enough to fund the transaction, you will see something like the message
below. In this case, the wallet was adding a transaction fee automatically. There were not
enough funds to cover the amount to send and the transaction fee.
You have the option to set a transaction fee. The transaction fee encourages the miners to
process your transaction faster. The default is the amount shown in the window above. Think
of the transaction fee as a tip for good service. When all the Bitcoin blocks are found, it will be
the transaction fees that keep the network going. At the present time, you are not required to
submit a transaction fee on small transfers. However, it is highly recommended that you get in
the habit of adding one. At the present time with BTC around $12, 0.005, BTC is equal to six
cents USD. This is nothing if you are sending $100 USD or 8.5 BTC or more. If you are only
sending 1.5 BTC as we are, consider giving 0.001. We will adjust the transaction fee to 0.005 for
this example.
Click on “Settings” in the toolbar.
Then select “Options”.
Use the arrow keys to move the value by 0.001 up or down to zero. Then click “Apply”.
Now let’s enter a new value to send.
This time it will go through and clear out our balance.
Confirmed Transactions
It takes six miners to process the transaction before it is considered fully confirmed. We were
able to resend the BTC before it was fully confirmed but not until it was confirmed at least
once. About 30 minutes after it was initially sent, it was still not fully confirmed:
After six confirmations, it is considered fully confirmed. The network will continue to confirm
the transactions. To view this, send my address 0.01 (Okay; you can use any address.) and
watch the confirmations build over the days and weeks. I have a transaction that is a few days
old and it has 500 confirmations. The chain of confirmation will continue to grow.
It took 41 minutes for the transaction to reach the six confirmations.
Other Transaction Types
Escrow
You might be asking yourself, if this marketplace is built on trust and non-revocable
transactions, then how can I do business with someone I do not trust? In some cases, trust will
have to be implicit with the fact that they are doing business in the marketplace and they
would not last if there was not trust. For instance, the market with high volume makes more
money by operating ethically than if they were to steal from any one person.
This is not the case with individuals. If someone is promising you something for BTC and you
do not know who they are, then suggest using an escrow service. These are services that exist
in order to broker trust between two untrusted parties.
Let us have Alice and Bob perform an escrowed transaction. The escrow service facilitates the
exchange for a fee. Let us trade something simple that seems to be a common untrusted
exchange. Alice finds Bob, and Alice wants to buy 50 BTC from Bob for $600 USD. You might
ask, “Why not just use the exchange?” As we noted in the previous sections, there are a lot of
middlemen in the process who all take a transaction fee. These fees can mount. The buyer
and seller will need to do their own math to determine if an over-the-counter transaction is
one worth their effort.
Bob will sign into an escrow site and set up a transaction and send the 50 BTC. Once the coins
are confirmed, then Alice will need to pay for the coins. She doesn’t have possession of them,
but neither does Bob. The escrow service has them. Once Alice pays Bob and provides a
method to verify the transaction has occurred, the escrow service will release the 50 BTC minus
the transaction fee. The ability to verify might be a PayPal transaction number that can be
viewed by both parties or some other agreed upon verification method. If the exchange is
goods, then the buyer may have an inspection time. Once the inspection time expires, then the
payment is made. These transactions are generally slow, so users beware. However, they are a
lot safer than the alternative. There are many scammers out there.
A list of escrow services can be found here:
There is more about secure trading here:
en.bitcoin.it
Over the Counter
Over-the-counter(OTC) trades are another way to trade BTC for government backed currency.
This system allows you to buy and sell BTC. To interact with the OTC, you will need to
download and install an Internet Relay Chat client. I will go over how to do this on Windows,
but there are clients for Mac and Linux as well.
You can use any IRC Client you want, but I will demonstrate the use of mIRC which costs $20.
You can download it from here: Http://www.mirc.com/get.html . There was a time when there
were free IRC clients. If you have access to one, feel free to use it. The commands I will be
demonstrating will work in any IRC Client.
Once you have it downloaded, go ahead and install it. Just accept all of the defaults. Once it is
installed, we need to set up your IRC Account. IRC will allow you to log in and interact
unverified. I highly recommend that you log in and create an account with a password. I will
review how to do this.
Double click on the icon on your desktop for mIRC:
You can use the tool for free for 30 days, or if you’d like and want to use it longer, you can
register it for about $20. Since there is a free 30 day trial, you can use it in order to follow my
instructions to create your IRC User (which is different than registering the IRC Client). You can
always find a different free one, or register this one at a later time. I am not affiliated with
mIRC, but I do have a registered copy.
When the application comes up, it will ask you to enter your Nickname, also known as a nick.
This is a unique name that you want to use in the channels. The channels are the community
message areas where chat can occur. I’ll explain that more once we are registered.
Then select the “Servers” item and change to Freenode > Random Server.
Click, “OK” and then hit the “Connect” button (looks like a lightning bolt) in the upper righthand corner of the screen.
You will see a screen that looks like this:
The arrow points to the Command window. The commands that you will need to type in will
need to be typed in here.
Once connected, enter:
/msg nickserv register <your-password> <your email address>
Use your own password and email address. Also note that your IP Address appeared. We will
fix this as well. Write down your password, and do not use a simple password, as it can be
stolen. You do not want someone to take over this account if you are going to establish it with
the Bitcoin OTC marketplace. You will receive an email with a command to verify. You must do
this step before you can continue.
/msg NickServ VERIFY REGISTER <your nick> <Code>
When you need to log in to IRC in the future, you will need to use the following command to
log in:
/nickserv identify<Password>
The token <Password> is replaced with your password. You will generally have about 30
seconds to enter it. If you do not enter it fast enough, the IRC server will boot you thinking you
are not the nick owner.
As I mentioned before, the IRC is made up of channels. You first need to visit the help channel
and ask for a cloak. This will hide your IP Address from prying eyes. Hackers will be looking for
you. If you leave the IP visible to them, they will be able to launch an attack against you. If
they get your wallet, it’s game over for your money. So you need to protect yourself.
To join the help channel use the following command:
/join #help
In the new channel window, ask the admin for a cloak. Simply type:
Admin, can I get a cloak?
Without the cloak, your IP Address is visible to everyone. With the cloak, your IP Address is
hidden from other users. This way they cannot detect what computer you are on and try to
attack it. So now when you log back in, you will be auto cloaked. It is important that you
obtain a cloak before you begin to trade. All an attacker needs in order to attempt to attack
you is your IP Address.
To join the Bitcoin OTC, let’s join the correct channel. Use the command:
/join #bitcoin-otc
To authenticate with the service, you need to interact with the channel bot. The bot is a
computer application that is logged into the channel as a user. The bot here is named gribble.
So to start a private conversation with gribble, type:
/query grible
You will see a new channel appear. This is gribble.
Let’s quickly try something with gribble before we authenticate. Enter the following command
and make sure to use the preceding semi-colons. That tells the bot you are entering a
command for it to consume.
;;ticker
You should see something like this:
<gribble> Best bid: 12.1388, Best ask: 12.19988, Bid-ask spread:
0.06108, Last trade: 12.1388, 24 hour volume: 39840, 24 hour low:
11.6304, 24 hour high: 12.27
Now switch over to your wallet and create a new receive address. We are going to use this in
the authentication process to follow. I named mine, 2012-09-23-Bitcoin-OTC.
Now copy the address and use the following command to authenticate:
;;bcregister <your handle> 1CXnFLTUc1Z15uvhune6P1VtjcXnrsbzq
You will receive a message stating:
<gribble> Request successful for user <your nick>, hostmask <your nick>!~<your
nicK>@unaffiliated/<your nick>. Your challenge string is: freenode:#bitcoin-otc:<Some long
string>
Go to your wallet application and select the “Receive Coins” button.
Select the address you just created and press the “Sign Message” button at the bottom of the
screen.
Now a sign message screen will appear:
Copy just the challenge string into the window in the area marked 1 which will look like this:
freenode:#bitcoinotc:2b5195d2442cbfc302a0b2f6d7b856cd04ecc0435d0e306827b94e9c
You must use the one provided in order for this to work for you. Then press the “Sign
Message” button. Then a message will appear in the window labeled 3. To copy this out, press
the “Copy to Clipboard” button.
Now in the IRC Client, issue the following command to gribble:
;;bcverify random-looking-gibberish-that-is-your-signed-messagegoes-here=
If the process worked, then you are authenticated with this nick. If it doesn’t work, review the
instructions here for more information:
The Bitcoin-OTC wiki has a lot more details about how to use the service. You can find the wiki
here:
There is an important note about trading on the OTC that I extracted from the wiki:
“There are no automatic systems set up to match buyers and sellers. The entire system is OTC,
if you see a bid/ask you like, contact the counterparty directly on channel or in private message
to set up the transaction. Issues to discuss may be: who bears the transaction fees? Who pays
first? What escrow agent do we use that is mutually trusted? Remember, this is a direct
negotiated transaction - so every detail is negotiable.” (Anonymous, Using bitcoin-otc, 2012)
More Information
More information about Bitcoin-OTC (Over The Counter) can be found here:
You can see the list of current orders on the BTC-OTC here:
 bitcoin-otc.com
For a more complete guide to IRC:
bitcoin-otc.com
For a more complete guide to IRC:
 en.wikipedia.org
List of IRC Commands:
en.wikipedia.org
List of IRC Commands:
en.wikipedia.org
Bitcoins in Action
So now you know about BTC. You have a wallet and probably funded your account. You know
that the value of the BTC is based on the fact that there is liquidity through the markets such
as MtGox. However, the supply and demand is driven by the fact that people can use the BTC
for something real. As long as there is something that people can use the BTC for, there will be
a market. For the naysayers who tell you BTC are not backed by anything, I would tell you that
as long as they can be liquidated to USD or other currencies and as long as BTC can buy you
something useful, there will be a market for them and an associated value. This value will be
driven by the number of people buying up BTC versus the number of people selling BTC.
Staying Informed
So if you are going to join the market, you will want to stay informed. There are many blogs
out there. Here are a few good online resources:
· http://bitcoin.alltop.com/
· https://twitter.com/bitcoinnews
· http://www.btcnn.com/
· http://www.bitcoinblogger.com/
· http://www.thebitcointrader.com/
· http://www.bitcoinnews.com/
A current list can be found on the wiki: https://en.bitcoin.it/wiki/Category:Blogs
Where to Spend
So let’s investigate some of the things that you can buy with BTC. I’m not going to go into much
detail about any one item. I will provide links below and you can investigate for yourself. I am
not personally endorsing any of the places here. I’m just trying to provide a list to kick start
your enjoyment. My goal is to demonstrate that there is a huge marketplace out there.
Equity Trading
These stock floors are not regulated like traditional trading, but some good deals can be
found. Just be careful who you do business with.
GLBSE: https://glbse.com/
BitFloor: https://bitfloor.com/
At the time of this writing, GLBSE had closed due to the lack of regulation. According to an
article given in Bitcoin Magazine, the goal is to open back up in a regulated manner. If they can
pull this off, this would be something significant. As a user, you should be careful in this
space. There can be a lot of scams.
The wiki site maintains all sorts of training sites (This is a must see page.):
en.bitcoin.it
You can also trade in the following:
· Precious metal
· Gift/Debit card
· Currencies
· Local In Hand Exchanges
Merchants that Accept Bitcoins
There are a number of places that you can go to make purchases with Bitcoins directly.
There are a couple of places that you can visit in order to find where you can spend the
Bitcoins. One of the sites is: https://www.spendbitcoins.com/places/
The wiki page previously mentioned, https://en.bitcoin.it/wiki/Trade, also lists systems you
need in order to enhance your ability to accept Bitcoins:
· Bitcoin eWallets
· Payment systems
· Escrow
· Mobile service
There is a list of VPN Services so that you can maintain anonymous connectivity from areas that
might impede on your right to do something on the internet.
There is a list of internet related services that you can buy that accept BTC. (##) is the number
currently listed.
· Creative Design Services (15 )
· Wed Design Services(50+)
· Art Design Services(6)
· Web hosting(36)
· Dedicated/Virtual Servers(20+)
· Domain Name Hosting(16)
· Email(2)
· VoIP/SMS(13)
· Security Services(7)
· Mobile App Development(3)
· Productivity(1)
· Other(13)
· Search Engines(1)
· Cloud Providers(7)
· Software(5)
· Education Related(13)
· Gambling(30+)
· Games(20+)
· Graphic Design(5)
· File Sharing(8)
· Music(20+)
· Virtual Art(2)
· Digital Downloads(6)
· Entertainment Books/Magazines(8)
· Social Media(2)
· Cyber Begging(1)
· Internet Marketing(1)
So let’s say you are not interested in internet related services. You can go shopping for just
about anything. I had originally planned to include the list from the wiki site in this book;
however, it consumed 25 pages. I realized it would be better to direct you to the wiki. This is a
valuable resource I highly recommend that you visit:
 en.bitcoin.it
Earning Bitcoins
en.bitcoin.it
Earning Bitcoins
So now you’re excited about everything you can do. However, you don’t want to pay the fees
associated with moving currency into the system. You would rather offer services. If you have
a service, I’m sure you can find a service out there that can help you get started. You certainly
can start a business and make it big in the Bitcoin world. It’s beyond the scope of this book to
tell you how to do that. With the number of services available, I think you can find someone
that can help you. When you figure it out, you could write an eBook to tell others how to do
so. I have not seen one available yet.
If you like eBay and Craigslist, check out the marketplaces if you have something to sell:
Marketplaces
· The Bitcoin Marketplace - Bitcoins classified site and marketplace. Buy and Sell
anything with Bitcoins.
· Bitcoin Harbor - Users can buy and sell for Bitcoins -- out of business.
· Bitmit Secure Bitcoin marketplace. Sell and buy goods for Bitcoin. Worldwide!
· MokiMarket The ebay/craigslist of Bitcoins!
· Bitcoin shopping Shop with your Bitcoins - Worldwide shipping
Auction sites
· CentBiz.com - One of the oldest Penny and Cent Auction online, BitCoins Accepted for
Payment. Available for Portugal, Ireland and UK. 0,25 euro/pound per Bid.
· Penny Auctions - Bartering marketplace where users can purchase credits to bid on
items, or earn credits by auctioning off goods or services as penny auctions for free. Bitcoin
is accepted as payment.
· Bidding Pond (info)
· Bidnapper eBay sniper - Places bids on eBay and other auction sites in the final
seconds, called sniping.
· Bitmarket (info)
· Bitmit - BitCoin auction house & shopping portal (English & German)
· goSnipe eBay Sniper - Place your bid in the final seconds of an eBay auction. Load your
account with Bitcoins.
· Myibidder Auction bid Sniper for eBay - Auction bid Sniper for eBay, bid on last
seconds automatically. The Windows client application can be purchased with Bitcoins.
· HASTUschon? (info) A German auction site.
· BitBid Bitcoin Auction House.
Mining
The big service out there is the mining service. All I’m going to do here is provide you with
some links as to how to get started mining. This is the only way to get BTC for essentially
nothing. You provide the hardware and the electricity to run the equipment, and you get paid.
As long as the electricity costs less than the BTC you are making, you turn a profit.
Beginners guide to mining: http://startbitcoin.com/
Mining Guide: http://www.weusecoins.com/mining-guide.php
Pooled Mining: https://en.bitcoin.it/wiki/Pooled_mining
Mining Hardware: https://en.bitcoin.it/wiki/Mining_hardware_comparison
Bitcoin Underbelly
I want to keep this book positive and promote the good about the Bitcoin infrastructure. There
is however an underbelly. There have been some high profile cases in just the past month or
so that have shed a bad light on the Bitcoins. That said, Bitcoins are not the problem, the
criminals are.
One article recently seems to indicate that the BTC transactions are not as anonymous as some
have thought or as easy to hide. This is in connection with the BitFloor heist, where $250,000
USD worth of BTC were stolen from various users.
Hacker Steals Bitcoins
BitFloor breached, hacker makes off with $250,000 in Bitcoins:
 www.techspot.com
Bitcoin thieves yet to spend stolen hoard:
www.techspot.com
Bitcoin thieves yet to spend stolen hoard:
 This article indicates that the transactions of the stolen keys are being watched. This is
interesting.
Ransom in Bitcoins
In a separate case, US presidential candidate Mitt Romney’s tax returns were stolen and the
hacker wanted to be paid in $1,000,000 USD payable to one of two BTC addresses. One would
release the tax returns, and the other would keep the tax returns hidden.
 venturebeat.com
Gambling with Bitcoins
venturebeat.com
Gambling with Bitcoins
A little over a year ago, a poker web site opened up SealsWithClubs which allowed people to
buy in with BTC. I place this in the underbelly because in the USA, it is illegal to gamble online.
For those of you in countries where gambling online is legal, this entry may not seem so
negative. Using BTC reduces the likelihood that offenders will be caught.
Buying Drugs with Bitcoins
Silk Road is selling drugs online in exchange for BTC:
I think this one speaks for itself.
Appendix A: Other Resources
Now that you know what a Bitcoin is, how to set up your own wallet, fund your account, earn,
spend and transfer BTC to government currency, you’re all set. There should be no other
information you need. J Not so. There is so much more out there than the scope of this
book.
The first place I recommend you take a look at is the wiki site:
en.bitcoin.it
Look at the Topic Central:
You can see the topics cover much more than this eBook did.
For in-depth technical information about the blocks:
blockchain.info
For a look at charts that show the market trends as a whole:
blockchain.info
Currency Exchange market watch can be found at:
If you are going to get into mining, before you buy anything make sure you consider the
products at Butterfly Labs:
 www.butterflylabs.com
Their new super computer line of mining rigs is the top of the line and 50 times faster for the
www.butterflylabs.com
Their new super computer line of mining rigs is the top of the line and 50 times faster for the
price than any of their competitors. We only touched on mining. Make sure you do your
homework and plan first. If your electricity costs are too high, you will not be turning a profit.
Besides the wiki, another great place to get information about the Bitcoin world is through
Bitcoin Magazine. This is an online publication with print versions available in many Barnes &
Noble Book stores.
At the bottom of the list of articles, there is a page selector so that you can scroll to more
articles. Check the last page, which lists some of the first stories written about wallets which
are good.
An Introduction to Terminology:
Part 1 http://bitcoinmagazine.net/introduction-to-bitcoin-terminology
Part 2 http://bitcoinmagazine.net/introduction-to-bitcoin-terminology-part-ii
I highly recommend that you visit the magazine. I’m a subscriber and enjoy the articles.
the developers of the software,
the designers of the mining rigs,
the miners digging for BTC blocks that keep the network alive,
the exchanges and services that tie non BTC to BTC so this market can coincide with traditional
markets,
the old hands that continue to help others enter the marketplace,
the newcomer who will be an old hand soon enough,
the merchants that use BTC in their Markets,
the depositors,
Cindi for editing this,
and my wife who realizes that I have BTC fever.
-Michael
Contents
Introduction
What Is A Bitcoin?
Bitcoin Storage
Bitcoin Exchange
Funding Your Market Account
Extracting Funds to Government Backed Currency
Bitcoin Transactions
Other Transaction Types
Bitcoins in Action
Earning Bitcoins
Bitcoin Underbelly
Appendix A: Other Resources
Appendix B: Bibliography
Introduction
The goal of this book is not to be the complete guide to Bitcoin (BTC). This eBook is meant to
get the new user up to speed quickly and safely. The user should be able to have a secure
wallet, buy and sell BTC, accept and send BTC with the same level of trust and confidence as
the existing user base.
There are many people before me that put a lot of hard work into documenting everything
there is to know about Bitcoins. My goal is to condense all that into something that will get
you up and running quickly. If you are the type of person willing to take the time and make the
mistakes, you can figure it out without this eBook. I had it figured out in about three weeks of
research and something like 80 to 100 hours of time. There has been even more time added
since then. I hope to fast track your user’s experience and get you using the BTC infrastructure
as easily as possible. The goal is to get you up to speed and using the Bitcoin network in the
time that it takes you to read this eBook.
I will make references throughout the eBook to a number of additional resources that expand
on the information that I’m giving you. Often times I will point to the wiki site. Throughout
many places in the eBook, there are screenshots from copyrighted sources. I did obtain the
written permission to include the screen shots. I hope you will visit the sites referenced in the
eBook.
What Is A Bitcoin?
A Bitcoin is a unit of measure in an online currency exchange system. Unlike government
backed fiat, such as the USD, there is no government or central owner of the BTC (Bitcoin). A
Bitcoin is traded within a peer to peer network which uses cryptographic processes to build
trust around each transaction, thus building proof of ownership for your BTC. According to the
Bitcoin wiki site:
“Bitcoin is an experimental new digital currency that enables instant payments to anyone,
anywhere in the world. Bitcoin uses peer-to-peer technology to operate with no central
authority: managing transactions and issuing money are carried out collectively by the
network. Bitcoin is also the name of the open source software which enables the use of this
currency.
The software is a community-driven open source project, released under the MIT license and
originally created by Satoshi Nakamoto.
Bitcoin is one of the first implementations of a concept called crypto-currency which was first
described in 1998 by Wei Dai on the cypherpunks mailing list. Building upon the notion that
money is any object, or any sort of record, accepted as payment for goods and services and
repayment of debts in a given country or socio-economic context, Bitcoin is designed around
the idea of using cryptography to control the creation and transfer of money, rather than
relying on central authorities.” (anonymous, 2012)
Let’s define a few terms.
Bitcoin: a unit of measure for the currency traded, which can be sent over the internet
Block: used to record the ownership of the BTC within the network
Hash: used in the cryptographic process
Market Value: the total number of BTC times the current exchange rate in the government
backed currency
Mining: The process of finding cryptographic hashes that can be used to keep the network
running or to find new blocks of 50 BTC which enter circulation after found
The current number of blocks is 199,446. There are 9,972,350 BTC and the USD Exchange rate is
$12.10 / BTC. So, the total market capitalization is $120,665,435 USD. In simple terms, if I had
$121 Million USD, I could buy all the BTC in existence if everyone sold them to me at the
current rate.
As I will explain in the chapters that follow, the exchange rate is determined by supply and
demand. What you should take away now is that the number of BTC is not fixed at this time
but growing. In the future it will become fixed.
The number of BTC grows slowly over time and will reach a maximum number at 21 million at
which time there will be no more BTC created. The only method through which new BTC can
enter into the market is through BTC Mining operations. This is where users buy specialized
computer equipment which can be used to process the work required to find the unique
hashes that are used for the network. The miners keep the network alive. The hardware they
use is what keeps the network traffic flowing. Without it moving, a transaction would not
occur. The miners must buy the equipment and pay for the electricity to run it. In exchange,
they stand a chance of finding new 50 BTC Blocks, known as a reward. The reward will reduce
to 25 BTC sometime around 12/1/2012. Once a miner finds the reward it becomes theirs.
Some miners mine in pools that share in the finds over time.
If you are the sort of reader that is strong in math and are looking for a really good source of
information about how the Bitcoin infrastructure works, here is a good link to the Bitcoin wiki:
Difficulty - Bitcoin Wiki
Bitcoin: A Peer-to-Peer Electronic Cash System [Illustrated]
ie=UTF8&qid=1348453217&sr=8-1&keywords=Bitcoin%3A+A+Peer-toPeer+Electronic+Cash+System
Bitcoin Storage
As a user of the Bitcoin network, you will eventually own your own BTC. You’ll need
somewhere to put them. The most logical place is a wallet. As it would happen, this is exactly
where you would put them, into an electronic wallet. The wallet can reside locally on your
computer, on a USB Stick or online in one of the many online wallet sites.
As a professional security practitioner, I feel the need to make the following statement with
regards to all implications of security referenced in this eBook:
Note: All claims to security in this book cannot take into account all threat vectors, namely
you. If you allow an attacker to infiltrate your computer with a Trojan that has a back door
and key logger, they will likely end up with your wallet.
There are many unforeseen attack surfaces. I will attempt to document some good practices. I
also cannot speak to the level of security actually provided on the secure online wallets.
Recently an exchange was infiltrated and approximately $250,000 USD worth of BTC was
stolen (Kirk, 2012).
My goal is not to scare would-be users away, but I do want to instill in them a fair sense of
security. I can say that I use the Bitcoin network and feel safe in using it.
Trading BTC
Let us start with how BTC is exchanged. In simple terms, the process of sending BTC from one
user to another is based on asymmetric cryptography. This means that if Alice wants to send
Bob 12.5 BTC, the following would have to occur:
1. Bob uses the wallet application to create an address, which is represented by the
software as a long string of alphanumeric characters.
2. Bob gives Alice the address which is the public key for which Bob has a matching
private key in his wallet.
3. Alice uses her Bitcoin application to send 12.5 BTC to Bob using the provided address.
4. The transaction is made public on the network and miners begin to process it.
5. Once the transaction has gone through enough cycles on the network, it is released to
Bob.
The 12.5 BTC are now no longer Alice’s. The 12.5 BTC now belong to Bob. The information that
proves Bob’s ownership exists in the database of blocks which is stored on your local PC by the
wallet application or on the online wallet service if you choose an online wallet. The proof of
ownership for Bob is that private key which is stored in his wallet. The fact that everyone in
the network has the same information protects Bob’s right to ownership as long as he retains
the secret keys. He could give someone his wallet, or it could be stolen from him and the
bearer would have the ability to take the BTC and transfer them to another account.
Online Wallets
The choice to use an online wallet is one which should be weighed heavily. I would like to
quote something from the wiki which I believe is very important:
“When bitcoins are stored online, the provider retains full control of those amounts. You are
trusting a third party to maintain your Bitcoin balance on your behalf. In comparison, if you run
the Bitcoin software yourself, you are in full control of your coins so long as the wallet file
stored on your computer is kept secret and secure.” (Anonymous, Browser-based wallet, 2012)
A list of eWallets can be found here: https://en.bitcoin.it/wiki/Category:EWallets
A newer breed of eWallet called Hybrid eWallet can be found here:
Category:HybridEWallets - Bitcoin Wiki
Blockchain Explorer - Bitcoin Tracker & More | Blockchain.com
The most popular and trusted Bitcoin block explorer and crypto transaction search engine.
blockchain.info
Their online wallet can be found at:
Blockchain.com - The Most Trusted Crypto Company
Blockchain.com is the most popular place to securely buy, store, and trade Bitcoin, Ethereum, and other top cryptocurrencies.
Step 2: Create Password
Create your password, and confirm it. Select a complex password. Use the following rule:
· At least one capital letter
· At least one lowercase letter
· At least one number
· At least one symbol ~!@#$%^&*()_+=-[]\{}|;’:”,./?><
· Make the password at least 24 characters in length
Following these steps will make it near impossible for an attacker to crack the password and
gain access to your account.
Next: WRITE DOWN THE PASSWORD, and keep it safe.
Enter the Captcha.
Press the “Continue” button.
Step 3: Make Note of the Wallet URL
I blocked out my address since I do not want to provide extra information to an attacker. Copy
the entire URL from https:// through to the end of that line.
You can optionally add an email address and nickname.
Then press “Proceed To Login”.
Step 4: Login to Online Wallet
Again, I covered up my address. You’ll notice that the address in the Address Bar of your
browser is the one previously noted.
Enter your password which you created in Step 2.
Press “Open Wallet”.
From here you can:
· Fund your wallet
· Withdraw funds
· Modify your account settings
· Back up your wallet
· Send money
· Receive money
· View your transactions
· View account balances
You’ll notice an address above the twitter bird. This is the address that others will use when
sending you BTC.
Until you have become very familiar with the BTC environment and your wallet, you should
consider not playing with the import/export functionality.
In the remainder of the book, I will demonstrate various tasks:
· Funding your wallet
· Sending BTC
· Receiving BTC
· Viewing transactions
If you have an iPhone, there is an application (of course) that will allow you to perform some
basic functions with your wallet. For instance you can view your balance, send and receive BTC.
Here is an address for more information on it:
Blockchain.com - The Most Trusted Crypto Company
Blockchain.com is the most popular place to securely buy, store, and trade Bitcoin, Ethereum, and other top cryptocurrencies.
this has been resolved, because I have downloaded it from the App Store and it works just
fine. Additionally, your other options are to load it on a jail broken phone. I highly discourage
this since any jail broken phone can easily be compromised by an attacker and render your
account vulnerable. If you have a way to build the app, you can download the source code,
compile it and load it on your phone. You will need a Mac and a number of tools to do this. I
have on occasion done this in the past. It is not for the faint of heart. If like me, you are a
software developer and happen to have this environment already, this might be an option.
Android is not left out either. There is an app on the Android Market. I have not reviewed this
app, but it does exist. Here is the address for more information:
Blockchain.com - The Most Trusted Crypto Company
Blockchain.com is the most popular place to securely buy, store, and trade Bitcoin, Ethereum, and other top cryptocurrencies.
You will receive an email shortly after setting up your account. When you receive the email:
· Log into your account if you are not already logged in.
· From the home screen, press the “Account Settings” button on the right-hand side of
the screen.
· You will be taken to a screen which has a small menu on the left-hand side.
· The General menu will be selected by default.
· Enter the code provided in the email and press the “Verify” button.
Step 6: Optional Security Features
If you decide to use an online wallet, consider some of the additional precautions available
such as:
· Double encrypting your wallet - This will use the password previously generated to
authenticate you. The second password will be used to make transactions.
· Use multi-factor authentication
· Payment notifications
Step 6A: Double Encryption
From the main URL:
Blockchain.com - The Most Trusted Crypto Company
Blockchain.com is the most popular place to securely buy, store, and trade Bitcoin, Ethereum, and other top cryptocurrencies.
Enter a password using the previously mentioned standard and write it down.
Step 6B: Multi-Factor Authentication
Multi-Factor Authentication (MFA) allows you to increase the security of your account. A
password helps keep your account safe because it allows you to keep something that you know
privately and present it to the service. Only someone that knows this piece of information can
gain access to your account. MFA allows you to add something that you have. One such
solution is the YubiKey which is a small USB device that plugs into your computer and acts like
a keyboard. When you press the button on the YubiKey, it types a One Time Password (OTP).
(This combined with your password that you know means that only if someone has both can
they access your account.) This means that someone can only access your account if they have
both the OTP and your password that only you know.
To configure your online wallet to use MFA, log in to the wallet.
Select the “Account Settings” button on the right-hand side of the screen.
Select the “Security” option in the menu on the left-hand side of this screen.
One option is to use a Yubikey. Yubikeys are a small USB device that stores cryptographic string
hashes and are synced to a server. You can find more information here:
Setup
Learn how you can set up your YubiKey and get started connecting to supported services and products. Discover the simplest method to secure logins today.
www.yubico.com
also need the USB key in order to gain access to your account. This follows the rule of
something you know, your password, and something you have, your Yubikey. If you do choose
to use an online wallet, I strongly suggest you invest in a $25 Yubikey.
Step 6C: Email Notifications
From the Account Settings screen, select the “Notification” menu option.
The options on this screen are fairly straight forward. You can have the wallet notify you via a
number of different methods and for a couple of different reasons. The simplest is to select
email.
To set up SMS Notifications, select the “SMS Notifications” checkbox. You will be prompted
with a list box of country codes. Select the one that fits where your phone service resides.
Then enter your phone number. In the U.S., make sure to enter your area code. Then press
“Enter” on your keyboard.
NOTE: I entered dashes the first time and the message didn’t come through. After waiting
about 15 minutes, I returned to the page and took the dashes from 555-555-1212 and made
the number 5555551212. Then, I hit enter again, and the SMS message arrived within 10
seconds.
When the confirmation code arrives, enter it, and then Press “Verify”.
Important Note for Online Wallet User
I will use the personal wallet to demonstrate much of the functionality around sending,
receiving BTC, as well as funding your account. While the steps will differ, the functionality can
be translated to how you would do it in the online wallet. The next section describes how to
create your personal wallet.
Personal Wallets
I will walk you through the process of installing and setting up your wallet on your local
computer. The basic setup will install a wallet.dat and blocks database on your local
computer. I will show you how you can secure this by moving it onto a secure drive using
TrueCrypt, an open source tool for creating secure drive volumes. I will walk you step by step
through the process. This will allow you to either store the wallet on a secure drive on your
computer’s hard drive or place it on a USB memory stick which you can secure in a fire safe or
other safe location.
Remember that if you lose the wallet, you have lost your money, so we will also see ways to
back this up. If all of this seems too much for you, then stick with the online wallet.
Step 1: Install the Bitcoin Wallet Software
Download the software from the wiki:
Bitcoin Wiki
The wiki also has a set of screen shots to walk you through the set up:
Help:Installing Bitcoin Core - Bitcoin Wiki
Step 2: Synchronize the Blocks
Once you have the software installed, you will notice that it begins a process of synchronizing
the blocks. This can take about 24 hours to complete and will transfer 2 to 4 GB of data to your
computer. It is an important step, and you will have to let it complete before you continue
performing other steps.
I recommend that you continue to read and come back to this step once it is complete. You
can continue with Steps 3 & 4 while you wait.
Once the initial blocks are installed, then you can continue with Step 5.
Step 3: Install TrueCrypt
There are a number of applications that can be used for this step. I chose TrueCrypt because
it’s open source, which means it’s free to use. It is also fast and reliable. The fact that it is
open source means that the code has been and can be reviewed by anyone which makes it
much more secure to use.
Download TrueCrypt from here:
Once downloaded, install the application.
Select the defaults.
Step 4: Create Secure Drive
Once installed, open the application:
Select “Create Volume” and follow the wizard.
Select “Next”.
You will want to place the volume either on a hard drive or on a thumb drive where you can
create at least a 10 GB file.
Select “Next”.
The size of the drive needs to be at least 10 GB.
Select “Next”.
This step is so very important. I cannot stress this enough.
Select a complex password. Use the following rule:
· At least one capital letter
· At least one lowercase letter
· At least one number
· At least one symbol ~!@#$%^&*()_+=-[]\{}|;’:”,./?><
· Make the password at least 24 characters in length
Following these steps will make it nearly impossible for an attacker to crack the code and gain
access to the drive should they find it and download it. They will have to download the entire
10 GB file in order to try to crack it.
Next: WRITE DOWN THE PASSWORD, and keep it safe. If you build a small fortune in BTC in
your secure drive and then forget the password to it and you followed my recommendation,
you may be safe from attack, but you’re not going to get into it either. Those BTC will be lost.
Select “Large Files”.
Select “Next”.
Select “Next”.
Then move the mouse around on this next screen and hit “Format”.
Step 5: Move Wallet and Blocks to Secure Drive
Do not continue with this step until the wallet application has finished synchronizing.
If the Wallet application is running, exit out of the application.
Open TrueCrypt and press “Select File”. Then, select the file we created in the above process.
Also select a free drive letter. You will want to use the same drive letter every time.
Now select “Mount”.
Enter your password, and hit “OK”.
If everything worked as it should, now the secure drive should be mounted and looks like a
hard drive.
Now we need to identify where your Bitcoins Wallet file is. The reference for what’s in the data
directory and where you can find it is here:
Data directory - Bitcoin Wiki
C:\Users\YourUserName\Appdata\Roaming\Bitcoin
With the Bitcoin wallet application closed, you want to copy the contents of this directory to
your new drive. First, make a directory in the new drive called Bitcoin. Now open that folder
and copy the files into it.
Step 6: Configure Your Wallet Application to Use the New Location
Once the files are copied over, we need to tell the app where the data files are. There is a
command line option that we need to set. To do this on Win7, right click on the desktop
shortcut and select “properties”. If there is no shortcut on your desktop, copy it from the Start
Menu to your desktop if you’d like, or edit the one in the Start Menu. That is up to you. You
will need to note which shortcut you edit. This is where you will need to launch it from in the
future. In the example below, I mounted my secure drive to Drive X, so the wallet.dat is located
in X:\bitcoin.
Notice the –datadir=x:\biticon
Add the parameters after the Bitcoin-qt.exe in the target. This is where you set the command
line option. It will differ for Linux and Mac operating systems. Press “OK”.
You’re done.
Step 7: Reopen Wallet App
The process to open your wallet will always be the following:
1. Open TrueCrypt.
2. Mount the Encrypted Drive.
3. Open bitcoin-qt (your wallet application) using the shortcut with the modified target.
If you try to open bitcoin-qt without opening the encrypted drive first, it will not be able to
locate the wallet or blocks while the encrypted disk drive is mounted.
Each time you open your wallet you will notice that it needs to synchronize with the network.
Do not leave it open. You should only open your wallet when it is required. If you do have a
Trojan or other back door on your computer, your wallet.dat file is vulnerable to being copied
off your system.
There is more information on the wiki about securing your wallet:
Storing bitcoins - Bitcoin Wiki
Once installed and all the blocks are updated, you will see the main overview screen.
The Overview Tab shows the current number of BTC you have and the most recent
transactions.
The Send Tab allows you to send BTC. I’ll demonstrate this in a later chapter.
The Receive Tab allows you to set up addresses that can be used to receive BTC. I’ll
demonstrate this in a later chapter.
The Transactions Tab will show you a history of the transactions for this wallet.
The Address Book allows you to enter addresses that you often send money to.
Export allows you to export your received addresses.
Bitcoin Exchange
Spending Bitcoins is certainly a useful thing to be able to do. However, until it takes over as the
primary currency, (I’m not suggesting it will.) users will need to be able to move government
issued money in and out of the system. This is done through exchanges. Currently, there are a
number of exchanges that convert many different denominations to and from BTC. The price
of the exchange is set by you, the buyers and sellers, in an open market format.
Anyone can sell BTC for USD, EUR or other currency. You can place an order to sell at a preset
amount known as a limit order. When someone decides they need to buy BTC, they can
purchase at that price. Users can also decide that they would like to buy BTC at a preset price.
They can enter a limit order and wait until someone determines it’s fair and sells their BTC.
The exchanges charge a small fee. One such market MtGox, the largest such market, charges
2.5% per trade.
Limit orders are good when you have a lot of BTC that you want to receive a specific price for
and have the time to wait. If you just want to buy or sell BTC, you can place a market order. If
the transaction is small, under a thousand USD, it should hit near the current bid or ask price
depending on if you are buying or selling. If you plan to sell a lot fast, expect to drive the price
down. If you plan to buy a lot, expect to drive the price up.
At the time of this writing, the current market capitalization in USD is $120 Million. You can see
the current market details at:
You can see the Market Book, the list of sell orders and buy orders outstanding for a given
market, at:
MtGox : http://bitcoincharts.com/markets/mtgoxUSD_depth.html
The number of BTC and the price they are being sold at or bought at is listed. There is a
calculator which can be used to determine how much a particular number BTC will cost and if
the order can be filled or not. This is useful if you want to obtain a specific price or if you will
be funding a Bitcoin purchase. You should plan the purchase. You may buy many coins and
drive up the price, then make a purchase shortly after at this elevated price. It is possible that
the price will drop significantly as someone else sells BTC at the bid price rather than your ask
purchase.
For example, based on the numbers in the chart shown above, let’s say you want to buy 742
coins. The last sale price will be $12.24. You will have just raised the price of BTC from about
$12.10 to $12.24 USD. If someone else comes in and sells their BTC to someone based on the
bid, which would occur if they didn’t want to wait to sell, then the new price would be $12.08.
As you can see, there can be some volatility in the markets.
There are a number of different markets that you can trade BTC to government backed
currency and government backed currency to BTC. For a list of the markets, visit the All
Markets page at:
or
A graphical market index with all the current markets can be found at:
The page provides Last Price, 30 day thumbnail, Average Price, Volume, Low and High, Bid and
Ask, 24 hr avg. and volume.
Another list of markets can be found on the Bitcoin wiki:
Trading bitcoins - Bitcoin Wiki
Given the large number of markets and the various ways to fund each of them, it is beyond the
scope of this eBook to describe every possible combination. I am currently a member of
MtGoxUSD, which is also the largest exchange. They claim, as of July 2011, to handle 80% of
the Bitcoin trade. See their home page for the reference: https://mtgox.com. From the current
numbers, it appears they do indeed have the largest share but not 80%. Demonstrating how to
fund on this market account is the best place to start since using it will provide you the best
liquidity.
Step 1: Sign Up for An Account
Once you are signed up, you’ll be asked to go through a verification process. You should
consider doing this. However, if you will not be moving more than $1,000 USD / day and
$10,000 USD /month, you do not need to be verified.
Step 2: Fund Your Account
From the Home Page, Select “Funding Options”.
To get money into the account, you can do a bank transfer, which is best for large amounts. If
you have cash and want to get it into the system fast, the following is one way to do it.
Step 2A: A Cash Deposit through BitInstant
Select “Cash Deposit via BitInstant”.
You can enter an amount and it will tell you the fees. For instance $500 will be $23.45, so
$476.55 will be deposited.
Then select the “Add Funds”.
You will be prompted if it is valid to send. There is an upper limit on deposit through this
method.
TrustCash will use your addresses provided to MtGox to determine the nearest locations where
you can deposit the funds. Select a bank location and fill in the information. You will be given
a receipt to take to that bank location.
The handling fee that I’m seeing is $1.26, which might be different if you use a different bank
than I selected, so the total fee to deposit this money is
· 4.49% + $1 = $23
· $1.26 at the bank
That comes to about 4.9% overall. That is not too bad, but you will lose money in the process
of trying to fund the account.
Step 2B: Alternative BitInstant – BitInstant Site Directly
Before going to the BitInstant site, it is important to note your account number from MtGox. It
can be found at the top of the web page in the center. It will say “Account Number” next to it.
You will need that number to ensure you will receive the money.
Go to the site: https://www.bitinstant.com/
Select “MoneyGram” in the Pay From drop down menu and “MtGox” in the Pay To drop down
menu. You can experiment with other options. Look to see if there are CVS or 7/11 stores that
support transactions in your area. Near me, only MoneyGrams are supported. I can go to WalMart and have it funded.
In the account box, place your MtGox account number.
Enter the amount to send and notification email.
When you do, you will be taken through a series of screens where you will verify additional
information. I cannot finish the process to get the screen shots. If I do, I will have an
outstanding money order. So there are no screen shots for this. When you do this, you will
end up at a ZipZap site where you can enter your phone number and search for a location to
send the MoneyGram.
Once you’re done entering your information, select “Create Payment Slip” at the bottom of the
screen.
Print this out and take it to the location you chose. I’ll continue with the example assuming
you picked Wal-Mart. At Wal-Mart, there is a Money Center generally in the front of the store.
Go there, grab a blue MoneyGram form and fill in the information. The slip you printed out
will have the information you need to properly fill it out.
Pay the clerk the money. Drive, walk, take a cab, bus or train home. Within 30 to 60 minutes,
your MtGox account will be funded.
The fees on this are a little bit less:
· 3.99% = $19.94 on $500
· $3.95 MoneyGram
Total Percentage is 4.78%, which is a little less than if you fund it directly from MtGox.
Step 3: Buying Bitcoins
If you recall from the Exchange section, you can place a market order to tell the system how
much USD you want to spend, and you’ll spend that much money and receive the number of
BTC based on current BTC for sale. Alternatively, you can enter a limit order and set the price
at which you want to buy the BTC. With a limit order, you will need to wait until someone in
the marketplace decides they want to sell at the price you are asking.
To enter a limit order:
· Enter the number BTC to buy.
· Enter the price to pay.
· Select the “Buy Bitcoins” button.
Your open order will be displayed in the bottom section of the screen. If you simply want to
place a market order, check the “market order” check box. Enter the number of BTC you wish
to buy, and you will be told approximately how much it will cost.
You can do the same for Selling Bitcoins.
Step 4: Sending the Bitcoins to Your Wallet
From the Trade window:
· Select “Funding Option”.
· Then, select the “Withdraw Funds” tab.
· Enter the number of BTC to transfer.
· Enter an address from your wallet. (See the section in a later chapter about creating an
address for others to send to you. You will use one of these addresses.)
· Select the Open transaction.
It is optional to pay the transaction fee on small transfers. The transaction fee helps pay the
miners. This is another way to help fund the infrastructure. If you consider adding 0.005 BTC
at $12USD/BTC, it works out to about $0.06. It is worth considering. It will speed up your
transaction. If you don’t, it will still go through but could take longer. The fee will provide an
incentive for the miners to continue to mine.
· Press “Confirm”.
Now check your wallet. Eventually you will see the money there. It does tend to move quickly.
Extracting Funds to Government Backed Currency
There are a number of ways to convert your BTC back to a government currency like the US
Dollar. MtGox is planning to release their MasterCard Debit card which will allow you to
maintain USD balance in your account and spend it directly using the debit/MC. This means
that you will not need to transfer the funds to your bank first. It is due to be released at any
time. Since we have already discussed using this market, when debit becomes available it
would be something worthwhile to look into. It is supposed to tie your USD or other currency
to the debit card which will work like a MasterCard. There really is not much to say about this
since it has not yet been released.
MtGox allows you to perform a bank wire to your bank. This will allow you to extract larger
sums of money directly to your bank. This is good for larger amounts since there is a $25
service charge involved.
Step 1: Where to Go
To get to withdraw the options, on the MtGox site:
· Go to “Home” in the main tool bar.
· Then select the option for “Funding options”.
· OR URL: https://mtgox.com/trade/funding-options
· Then select “Withdraw Funds”.
· Select the “Available Withdraw Methods” drop down to select one of the many
methods.
Step 2: How to Add Other Options
· Press the “Add Withdraw Method”.
· Select the “Bank Transfer”
Select one of the methods that suit your needs.
Step 3: Add money to PayPal
There are a couple of methods to do this. I will walk you through the one I found to be the
easiest. The fees are a little higher.
Step 3A: BTCPak
Go to https://www.btcpak.com/
This is going to allow you to convert BTC to MoneyPak which can be used like cash to fund your
PayPal card or pre-paid debit cards.
You will also need to add an address for refunds to be sent to in the event a refund is
required. This is rare but if for some reason a refund is made and there is no address, the BTC
will be lost. You should use an address that exists in your wallet, so you end up with the
money in the event of a refund.
Without BTC to move out, I cannot show more steps.
You’ll notice that the funding of the MP takes about one hour. The one hour is the time that it
takes for six confirmations of the transaction to occur. If you send money from MtGox and Use
a Green Address, it will create the MoneyPak instantly.
Bitcoin Transactions
Now that you understand what a Bitcoin is, how to store them, what gives them value and how
to fund your account, let us talk about how to send and receive them. When you use a wallet
to store your BTC, you know that it actually stores a key, which proves your ownership. This
key is actually a pair. There is a public key and a private key. The public key is known as an
address. This address can be used to send BTC from one user to another. BTC are traded using
Public Key Cryptography.
A full description of Public Key Cryptography is beyond the scope of eBook. I will give you a
simple explanation. For a complete explanation checkout:
Public-key cryptography - Wikipedia
en.wikipedia.org
Two very large prime numbers are found that when used can both unlock a message if the
message is encrypted with one of them. One of the numbers becomes the public key and the
other becomes the secret key. Encrypting with one key allows the message to be decrypted
only by the corresponding number (key). We can then provide our public key, and when
someone uses it to send (encrypt) BTC to us, we are the only ones with our secret key that can
receive (decrypt) it.
Let us say we have Alice and Bob who want to exchange BTC. Both have a key pair.
1. Alice uses Bob’s public key to send the money.
2. The BTC is encrypted with Bob’s public key.
3. The Transaction is signed by many of the miners using the hashes they are finding. This
builds the trust in the network.
4. Bob can then open the transaction with Bob’s private key.
Receiving BTC
To receive the BTC, open your wallet. We will demonstrate here with Bitcoin-qt. Use the
procedures previously noted to open your wallet. Once open, if it has shut down for a while,
you will notice it is out of sync.
Give it a little time and it will begin to sync.
The syncing is the application going out and getting the most current blocks. These blocks tell
the application who owns what. It only knows based on the signed blocks. Either a local
private key in the wallet can decipher the block and prove ownership, or it cannot. These are
the only two options.
So, if someone sends you BTC and your wallet is not in sync, you may not see the transaction
come through. Once all the blocks are in sync, you will be able to see it.
Once you can see the green check mark in the lower right-hand corner, the wallet is synced.
In order to have someone send you BTC, you will need to create an address for them. Click on
the “Receive Coins” button:
Create a new address. Press the button in the lower left side of the screen, “New Address”.
Give it a name. I like using the convention Year-Month-Day name. This allows me to know how
old the address is.
Click “OK”, and the address will show up in the receive window.
To get the address so that you can provide it to others, right click on the address and select
“Copy Address”.
Address to send to: 13QPmiJymZpuv2q2rhdgXWokdybit8cFZC
Now we can provide that address to another person to send us BTC.
When a new transaction comes in, you will see a message in the lower right-hand corner (on
windows).
If you switch to the Overview Tab, you can also see the transaction:
Notice that you see an unconfirmed amount and that there is still a zero balance. The
transaction needs to be processed. Trust needs to be built around this transaction. Once that
occurs, you can spend the BTC. When we cover sending BTC, you will see there is an option to
pay a transaction fee in order to speed up the handling of the transaction.
If you go to the Transaction Tab, you can see the transaction.
Double click on the transaction to see the details.
About nine minutes later, the transaction received its first confirmation.
Switching to the Overview Tab, we can see that the BTC is now confirmed and is in your
balance:
Sending BTC
In order to send BTC, you first need an address to send to. For this demonstration, we will use
the eBook Demonstration in my other wallet:
1P9scjVao6n9t9ihNUBGXiCSHYAghzhzY7
Please feel free to send BTC to any of the addresses listed in this book. J Donations are
welcome even if it is only 0.01 or less.
To send, click on the “Send Coins” button.
Then enter the address and a label to help you remember why you sent me the BTC.
When the confirm message appears, click “Yes”.
If you do not have enough to fund the transaction, you will see something like the message
below. In this case, the wallet was adding a transaction fee automatically. There were not
enough funds to cover the amount to send and the transaction fee.
You have the option to set a transaction fee. The transaction fee encourages the miners to
process your transaction faster. The default is the amount shown in the window above. Think
of the transaction fee as a tip for good service. When all the Bitcoin blocks are found, it will be
the transaction fees that keep the network going. At the present time, you are not required to
submit a transaction fee on small transfers. However, it is highly recommended that you get in
the habit of adding one. At the present time with BTC around $12, 0.005, BTC is equal to six
cents USD. This is nothing if you are sending $100 USD or 8.5 BTC or more. If you are only
sending 1.5 BTC as we are, consider giving 0.001. We will adjust the transaction fee to 0.005 for
this example.
Click on “Settings” in the toolbar.
Then select “Options”.
Use the arrow keys to move the value by 0.001 up or down to zero. Then click “Apply”.
Now let’s enter a new value to send.
This time it will go through and clear out our balance.
Confirmed Transactions
It takes six miners to process the transaction before it is considered fully confirmed. We were
able to resend the BTC before it was fully confirmed but not until it was confirmed at least
once. About 30 minutes after it was initially sent, it was still not fully confirmed:
After six confirmations, it is considered fully confirmed. The network will continue to confirm
the transactions. To view this, send my address 0.01 (Okay; you can use any address.) and
watch the confirmations build over the days and weeks. I have a transaction that is a few days
old and it has 500 confirmations. The chain of confirmation will continue to grow.
It took 41 minutes for the transaction to reach the six confirmations.
Other Transaction Types
Escrow
You might be asking yourself, if this marketplace is built on trust and non-revocable
transactions, then how can I do business with someone I do not trust? In some cases, trust will
have to be implicit with the fact that they are doing business in the marketplace and they
would not last if there was not trust. For instance, the market with high volume makes more
money by operating ethically than if they were to steal from any one person.
This is not the case with individuals. If someone is promising you something for BTC and you
do not know who they are, then suggest using an escrow service. These are services that exist
in order to broker trust between two untrusted parties.
Let us have Alice and Bob perform an escrowed transaction. The escrow service facilitates the
exchange for a fee. Let us trade something simple that seems to be a common untrusted
exchange. Alice finds Bob, and Alice wants to buy 50 BTC from Bob for $600 USD. You might
ask, “Why not just use the exchange?” As we noted in the previous sections, there are a lot of
middlemen in the process who all take a transaction fee. These fees can mount. The buyer
and seller will need to do their own math to determine if an over-the-counter transaction is
one worth their effort.
Bob will sign into an escrow site and set up a transaction and send the 50 BTC. Once the coins
are confirmed, then Alice will need to pay for the coins. She doesn’t have possession of them,
but neither does Bob. The escrow service has them. Once Alice pays Bob and provides a
method to verify the transaction has occurred, the escrow service will release the 50 BTC minus
the transaction fee. The ability to verify might be a PayPal transaction number that can be
viewed by both parties or some other agreed upon verification method. If the exchange is
goods, then the buyer may have an inspection time. Once the inspection time expires, then the
payment is made. These transactions are generally slow, so users beware. However, they are a
lot safer than the alternative. There are many scammers out there.
A list of escrow services can be found here:
There is more about secure trading here:
Secure Trading - Bitcoin Wiki
Over-the-counter(OTC) trades are another way to trade BTC for government backed currency.
This system allows you to buy and sell BTC. To interact with the OTC, you will need to
download and install an Internet Relay Chat client. I will go over how to do this on Windows,
but there are clients for Mac and Linux as well.
You can use any IRC Client you want, but I will demonstrate the use of mIRC which costs $20.
You can download it from here: Http://www.mirc.com/get.html . There was a time when there
were free IRC clients. If you have access to one, feel free to use it. The commands I will be
demonstrating will work in any IRC Client.
Once you have it downloaded, go ahead and install it. Just accept all of the defaults. Once it is
installed, we need to set up your IRC Account. IRC will allow you to log in and interact
unverified. I highly recommend that you log in and create an account with a password. I will
review how to do this.
Double click on the icon on your desktop for mIRC:
You can use the tool for free for 30 days, or if you’d like and want to use it longer, you can
register it for about $20. Since there is a free 30 day trial, you can use it in order to follow my
instructions to create your IRC User (which is different than registering the IRC Client). You can
always find a different free one, or register this one at a later time. I am not affiliated with
mIRC, but I do have a registered copy.
When the application comes up, it will ask you to enter your Nickname, also known as a nick.
This is a unique name that you want to use in the channels. The channels are the community
message areas where chat can occur. I’ll explain that more once we are registered.
Then select the “Servers” item and change to Freenode > Random Server.
Click, “OK” and then hit the “Connect” button (looks like a lightning bolt) in the upper righthand corner of the screen.
You will see a screen that looks like this:
The arrow points to the Command window. The commands that you will need to type in will
need to be typed in here.
Once connected, enter:
/msg nickserv register <your-password> <your email address>
Use your own password and email address. Also note that your IP Address appeared. We will
fix this as well. Write down your password, and do not use a simple password, as it can be
stolen. You do not want someone to take over this account if you are going to establish it with
the Bitcoin OTC marketplace. You will receive an email with a command to verify. You must do
this step before you can continue.
/msg NickServ VERIFY REGISTER <your nick> <Code>
When you need to log in to IRC in the future, you will need to use the following command to
log in:
/nickserv identify<Password>
The token <Password> is replaced with your password. You will generally have about 30
seconds to enter it. If you do not enter it fast enough, the IRC server will boot you thinking you
are not the nick owner.
As I mentioned before, the IRC is made up of channels. You first need to visit the help channel
and ask for a cloak. This will hide your IP Address from prying eyes. Hackers will be looking for
you. If you leave the IP visible to them, they will be able to launch an attack against you. If
they get your wallet, it’s game over for your money. So you need to protect yourself.
To join the help channel use the following command:
/join #help
In the new channel window, ask the admin for a cloak. Simply type:
Admin, can I get a cloak?
Without the cloak, your IP Address is visible to everyone. With the cloak, your IP Address is
hidden from other users. This way they cannot detect what computer you are on and try to
attack it. So now when you log back in, you will be auto cloaked. It is important that you
obtain a cloak before you begin to trade. All an attacker needs in order to attempt to attack
you is your IP Address.
To join the Bitcoin OTC, let’s join the correct channel. Use the command:
/join #bitcoin-otc
To authenticate with the service, you need to interact with the channel bot. The bot is a
computer application that is logged into the channel as a user. The bot here is named gribble.
So to start a private conversation with gribble, type:
/query grible
You will see a new channel appear. This is gribble.
Let’s quickly try something with gribble before we authenticate. Enter the following command
and make sure to use the preceding semi-colons. That tells the bot you are entering a
command for it to consume.
;;ticker
You should see something like this:
<gribble> Best bid: 12.1388, Best ask: 12.19988, Bid-ask spread:
0.06108, Last trade: 12.1388, 24 hour volume: 39840, 24 hour low:
11.6304, 24 hour high: 12.27
Now switch over to your wallet and create a new receive address. We are going to use this in
the authentication process to follow. I named mine, 2012-09-23-Bitcoin-OTC.
Now copy the address and use the following command to authenticate:
;;bcregister <your handle> 1CXnFLTUc1Z15uvhune6P1VtjcXnrsbzq
You will receive a message stating:
<gribble> Request successful for user <your nick>, hostmask <your nick>!~<your
nicK>@unaffiliated/<your nick>. Your challenge string is: freenode:#bitcoin-otc:<Some long
string>
Go to your wallet application and select the “Receive Coins” button.
Select the address you just created and press the “Sign Message” button at the bottom of the
screen.
Now a sign message screen will appear:
Copy just the challenge string into the window in the area marked 1 which will look like this:
freenode:#bitcoinotc:2b5195d2442cbfc302a0b2f6d7b856cd04ecc0435d0e306827b94e9c
You must use the one provided in order for this to work for you. Then press the “Sign
Message” button. Then a message will appear in the window labeled 3. To copy this out, press
the “Copy to Clipboard” button.
Now in the IRC Client, issue the following command to gribble:
;;bcverify random-looking-gibberish-that-is-your-signed-messagegoes-here=
If the process worked, then you are authenticated with this nick. If it doesn’t work, review the
instructions here for more information:
The Bitcoin-OTC wiki has a lot more details about how to use the service. You can find the wiki
here:
There is an important note about trading on the OTC that I extracted from the wiki:
“There are no automatic systems set up to match buyers and sellers. The entire system is OTC,
if you see a bid/ask you like, contact the counterparty directly on channel or in private message
to set up the transaction. Issues to discuss may be: who bears the transaction fees? Who pays
first? What escrow agent do we use that is mutually trusted? Remember, this is a direct
negotiated transaction - so every detail is negotiable.” (Anonymous, Using bitcoin-otc, 2012)
More Information
More information about Bitcoin-OTC (Over The Counter) can be found here:
You can see the list of current orders on the BTC-OTC here:
#bitcoin-otc order book
IRC - Wikipedia
en.wikipedia.org
List of Internet Relay Chat commands - Wikipedia
en.wikipedia.org
So now you know about BTC. You have a wallet and probably funded your account. You know
that the value of the BTC is based on the fact that there is liquidity through the markets such
as MtGox. However, the supply and demand is driven by the fact that people can use the BTC
for something real. As long as there is something that people can use the BTC for, there will be
a market. For the naysayers who tell you BTC are not backed by anything, I would tell you that
as long as they can be liquidated to USD or other currencies and as long as BTC can buy you
something useful, there will be a market for them and an associated value. This value will be
driven by the number of people buying up BTC versus the number of people selling BTC.
Staying Informed
So if you are going to join the market, you will want to stay informed. There are many blogs
out there. Here are a few good online resources:
· http://bitcoin.alltop.com/
· https://twitter.com/bitcoinnews
· http://www.btcnn.com/
· http://www.bitcoinblogger.com/
· http://www.thebitcointrader.com/
· http://www.bitcoinnews.com/
A current list can be found on the wiki: https://en.bitcoin.it/wiki/Category:Blogs
Where to Spend
So let’s investigate some of the things that you can buy with BTC. I’m not going to go into much
detail about any one item. I will provide links below and you can investigate for yourself. I am
not personally endorsing any of the places here. I’m just trying to provide a list to kick start
your enjoyment. My goal is to demonstrate that there is a huge marketplace out there.
Equity Trading
These stock floors are not regulated like traditional trading, but some good deals can be
found. Just be careful who you do business with.
GLBSE: https://glbse.com/
BitFloor: https://bitfloor.com/
At the time of this writing, GLBSE had closed due to the lack of regulation. According to an
article given in Bitcoin Magazine, the goal is to open back up in a regulated manner. If they can
pull this off, this would be something significant. As a user, you should be careful in this
space. There can be a lot of scams.
The wiki site maintains all sorts of training sites (This is a must see page.):
Trading bitcoins - Bitcoin Wiki
· Precious metal
· Gift/Debit card
· Currencies
· Local In Hand Exchanges
Merchants that Accept Bitcoins
There are a number of places that you can go to make purchases with Bitcoins directly.
There are a couple of places that you can visit in order to find where you can spend the
Bitcoins. One of the sites is: https://www.spendbitcoins.com/places/
The wiki page previously mentioned, https://en.bitcoin.it/wiki/Trade, also lists systems you
need in order to enhance your ability to accept Bitcoins:
· Bitcoin eWallets
· Payment systems
· Escrow
· Mobile service
There is a list of VPN Services so that you can maintain anonymous connectivity from areas that
might impede on your right to do something on the internet.
There is a list of internet related services that you can buy that accept BTC. (##) is the number
currently listed.
· Creative Design Services (15 )
· Wed Design Services(50+)
· Art Design Services(6)
· Web hosting(36)
· Dedicated/Virtual Servers(20+)
· Domain Name Hosting(16)
· Email(2)
· VoIP/SMS(13)
· Security Services(7)
· Mobile App Development(3)
· Productivity(1)
· Other(13)
· Search Engines(1)
· Cloud Providers(7)
· Software(5)
· Education Related(13)
· Gambling(30+)
· Games(20+)
· Graphic Design(5)
· File Sharing(8)
· Music(20+)
· Virtual Art(2)
· Digital Downloads(6)
· Entertainment Books/Magazines(8)
· Social Media(2)
· Cyber Begging(1)
· Internet Marketing(1)
So let’s say you are not interested in internet related services. You can go shopping for just
about anything. I had originally planned to include the list from the wiki site in this book;
however, it consumed 25 pages. I realized it would be better to direct you to the wiki. This is a
valuable resource I highly recommend that you visit:
Trading bitcoins - Bitcoin Wiki
So now you’re excited about everything you can do. However, you don’t want to pay the fees
associated with moving currency into the system. You would rather offer services. If you have
a service, I’m sure you can find a service out there that can help you get started. You certainly
can start a business and make it big in the Bitcoin world. It’s beyond the scope of this book to
tell you how to do that. With the number of services available, I think you can find someone
that can help you. When you figure it out, you could write an eBook to tell others how to do
so. I have not seen one available yet.
If you like eBay and Craigslist, check out the marketplaces if you have something to sell:
Marketplaces
· The Bitcoin Marketplace - Bitcoins classified site and marketplace. Buy and Sell
anything with Bitcoins.
· Bitcoin Harbor - Users can buy and sell for Bitcoins -- out of business.
· Bitmit Secure Bitcoin marketplace. Sell and buy goods for Bitcoin. Worldwide!
· MokiMarket The ebay/craigslist of Bitcoins!
· Bitcoin shopping Shop with your Bitcoins - Worldwide shipping
Auction sites
· CentBiz.com - One of the oldest Penny and Cent Auction online, BitCoins Accepted for
Payment. Available for Portugal, Ireland and UK. 0,25 euro/pound per Bid.
· Penny Auctions - Bartering marketplace where users can purchase credits to bid on
items, or earn credits by auctioning off goods or services as penny auctions for free. Bitcoin
is accepted as payment.
· Bidding Pond (info)
· Bidnapper eBay sniper - Places bids on eBay and other auction sites in the final
seconds, called sniping.
· Bitmarket (info)
· Bitmit - BitCoin auction house & shopping portal (English & German)
· goSnipe eBay Sniper - Place your bid in the final seconds of an eBay auction. Load your
account with Bitcoins.
· Myibidder Auction bid Sniper for eBay - Auction bid Sniper for eBay, bid on last
seconds automatically. The Windows client application can be purchased with Bitcoins.
· HASTUschon? (info) A German auction site.
· BitBid Bitcoin Auction House.
Mining
The big service out there is the mining service. All I’m going to do here is provide you with
some links as to how to get started mining. This is the only way to get BTC for essentially
nothing. You provide the hardware and the electricity to run the equipment, and you get paid.
As long as the electricity costs less than the BTC you are making, you turn a profit.
Beginners guide to mining: http://startbitcoin.com/
Mining Guide: http://www.weusecoins.com/mining-guide.php
Pooled Mining: https://en.bitcoin.it/wiki/Pooled_mining
Mining Hardware: https://en.bitcoin.it/wiki/Mining_hardware_comparison
Bitcoin Underbelly
I want to keep this book positive and promote the good about the Bitcoin infrastructure. There
is however an underbelly. There have been some high profile cases in just the past month or
so that have shed a bad light on the Bitcoins. That said, Bitcoins are not the problem, the
criminals are.
One article recently seems to indicate that the BTC transactions are not as anonymous as some
have thought or as easy to hide. This is in connection with the BitFloor heist, where $250,000
USD worth of BTC were stolen from various users.
Hacker Steals Bitcoins
BitFloor breached, hacker makes off with $250,000 in Bitcoins:
BitFloor breached, hacker makes off with $250,000 in BitCoins
The future of BitFloor, the largest BitCoin exchange in the United States is uncertain after its founder announced yesterday that the company has suspended operations due to...
www.techspot.com
Bitcoin thieves yet to spend stolen hoard
Thieves who stole almost £160,000 in digital coins are yet to spend the loot they took, says the victim of the theft.
www.bbc.com
interesting.
Ransom in Bitcoins
In a separate case, US presidential candidate Mitt Romney’s tax returns were stolen and the
hacker wanted to be paid in $1,000,000 USD payable to one of two BTC addresses. One would
release the tax returns, and the other would keep the tax returns hidden.
Hacker holds alleged Romney tax returns ransom for $1M in Bitcoins
Ready for the most outlandish story of your morning? Here we go. Today, a hacker allegedly stole Mitt Romney's tax returns, is demanding $1 million in Bitcoins for silence, and sent a USB drive and letter to the GOP and Democratic party offices in Williamson County, Tennessee as proof.
venturebeat.com
A little over a year ago, a poker web site opened up SealsWithClubs which allowed people to
buy in with BTC. I place this in the underbelly because in the USA, it is illegal to gamble online.
For those of you in countries where gambling online is legal, this entry may not seem so
negative. Using BTC reduces the likelihood that offenders will be caught.
Buying Drugs with Bitcoins
Silk Road is selling drugs online in exchange for BTC:
I think this one speaks for itself.
Appendix A: Other Resources
Now that you know what a Bitcoin is, how to set up your own wallet, fund your account, earn,
spend and transfer BTC to government currency, you’re all set. There should be no other
information you need. J Not so. There is so much more out there than the scope of this
book.
The first place I recommend you take a look at is the wiki site:
Bitcoin Wiki
You can see the topics cover much more than this eBook did.
For in-depth technical information about the blocks:
Blockchain Explorer - Bitcoin Tracker & More | Blockchain.com
The most popular and trusted Bitcoin block explorer and crypto transaction search engine.
blockchain.info
Blockchain.com | Blockchain Charts
The most trusted source for data on the bitcoin blockchain.
blockchain.info
If you are going to get into mining, before you buy anything make sure you consider the
products at Butterfly Labs:
ButterFly Labs Magazine
www.butterflylabs.com
price than any of their competitors. We only touched on mining. Make sure you do your
homework and plan first. If your electricity costs are too high, you will not be turning a profit.
Besides the wiki, another great place to get information about the Bitcoin world is through
Bitcoin Magazine. This is an online publication with print versions available in many Barnes &
Noble Book stores.
At the bottom of the list of articles, there is a page selector so that you can scroll to more
articles. Check the last page, which lists some of the first stories written about wallets which
are good.
An Introduction to Terminology:
Part 1 http://bitcoinmagazine.net/introduction-to-bitcoin-terminology
Part 2 http://bitcoinmagazine.net/introduction-to-bitcoin-terminology-part-ii
I highly recommend that you visit the magazine. I’m a subscriber and enjoy the articles.